ChatGPT
 Claude
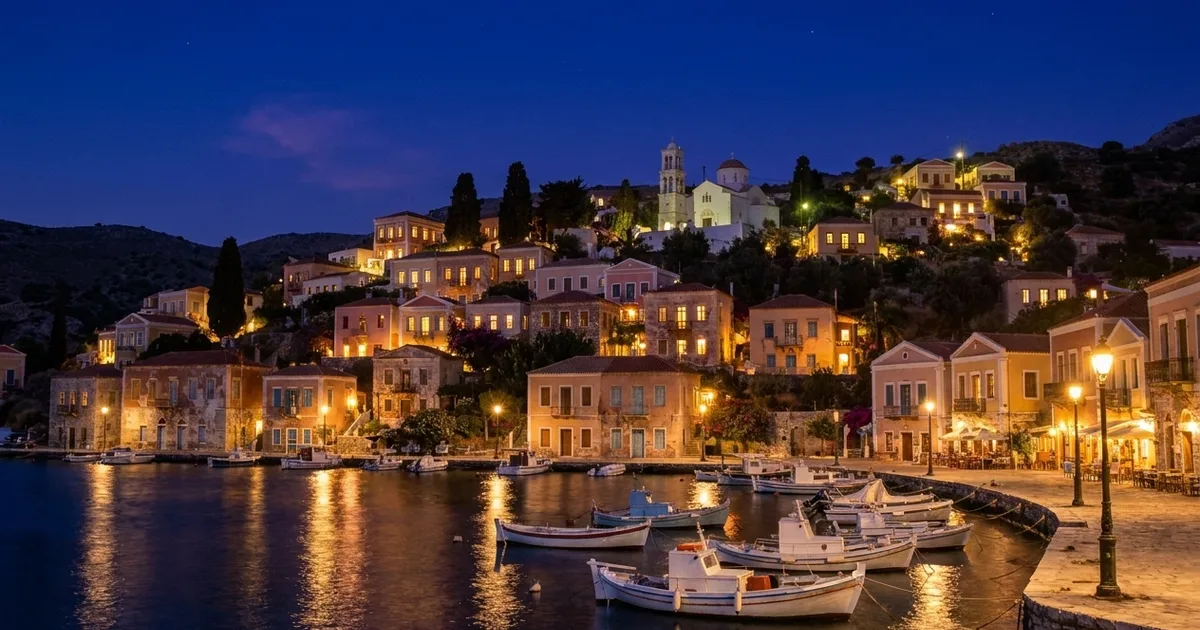
Day to night photo AI turns a daytime picture into a night scene. Good tools do more than darken the image: they switch on windows and street lamps, swap the sky, and add reflections in water and glass. To get a believable result, start with a photo that has light sources in it, pick a night style that matches the place, and check the shadows and reflections before you use it.
Oakgen's AI day to night converter has four night styles: City Lights, Moonlit, Starry Night and Neon Night. Below is a real before and after, the settings, and a checklist for spotting a fake-looking night.
Day to night tools compared
We read the pages ranking for this search on 2026-11-16. Most offer upload, describe the mood, and generate. They differ in presets, pricing and how much you have to write yourself.
| Tool | How you set the mood | Best for | Weak spot | Cost note (2026-11-16) |
|---|---|---|---|---|
| Oakgen Day to Night | Four presets plus an optional prompt | Quick, consistent night versions; choice of three models | No darkness or intensity slider | 28 to 72 credits per render; paid plans only |
| Sirv AI Studio | Preset with an intensity control | Product and property photos at volume | Narrower style range | 2 credits per image, per its page |
| Dreamina (CapCut) | Free-text prompt | Many variations and edits after generation | You write the whole prompt | Daily free credits, per its page |
| Media.io | Mood options plus prompt | Blue hour and dusk looks | Signup credits run out quickly | Free signup credits, per its page |
| Mew Design | Chat-style instructions | Fixing one detail at a time after the first pass | Slower, conversational workflow | Free signup credits, per its page |
Our view: if you know exactly what you want, a prompt tool like Dreamina gives you the most control. If you need the same treatment across many photos, presets are faster and more consistent. That is where the Oakgen template fits.
What the Oakgen template does
From the template's definition in Oakgen's code, checked on 2026-11-16:
- Input: one daytime photo.
- Night Style: City Lights (the default, "nighttime with city lights and street lamps"), Moonlit ("soft blue glow"), Starry Night, or Neon Night.
- Instruction to the model: convert the photo while "maintaining recognizable elements" and adding night lighting and atmosphere. The template tells the model to avoid a result that is "just darkened, no lights, unrealistic, flat."
- Models: Nano Banana Pro (the default), Nano Banana 2, GPT Image 2.
- Estimated time: 10 to 15 seconds.
The page works signed out for setup: upload, pick the style and model, then Open in Oakgen to generate inside the app on a paid plan.
Real test: a harbour at midday, then at night
We generated a daytime photo of a fictional harbour town and ran it through City Lights on Nano Banana Pro at 1K. We added one line of our own naming the light sources: warm windows, street lamps along the quay reflecting in the water, and a deep blue sky.
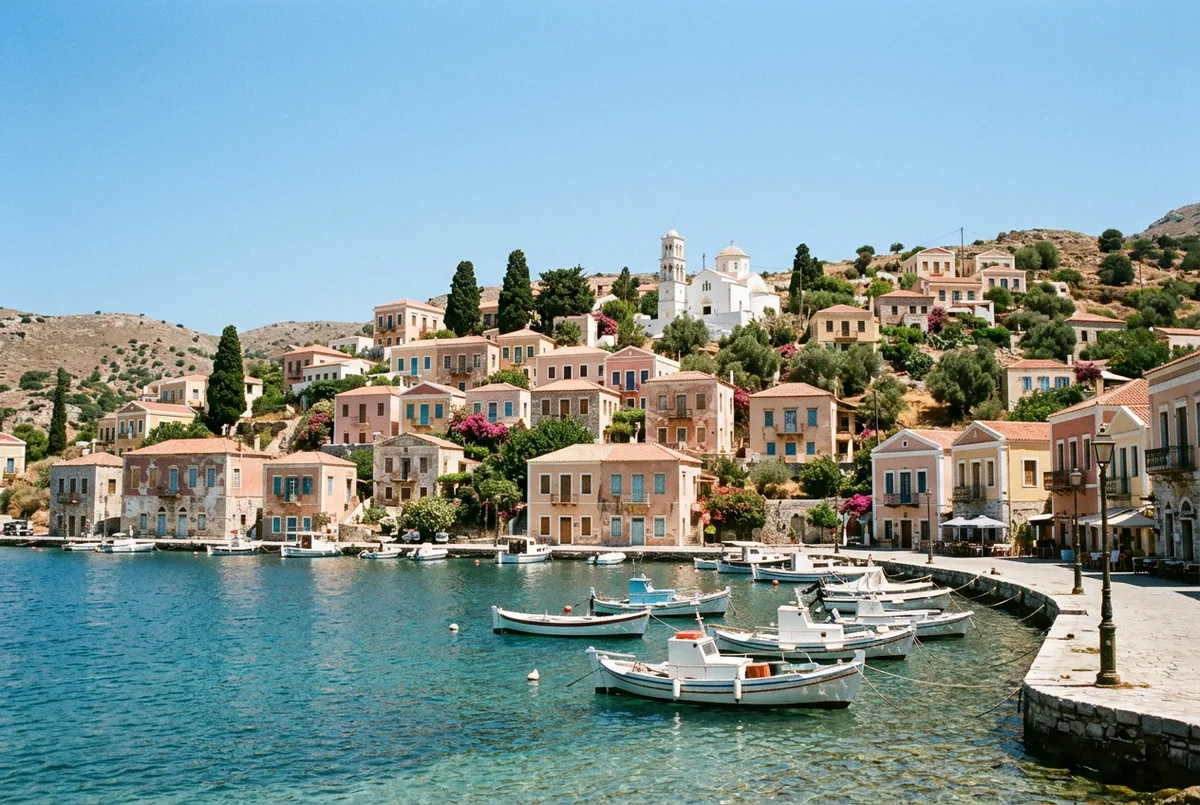
Before: an AI-generated photo of a fictional town at midday.
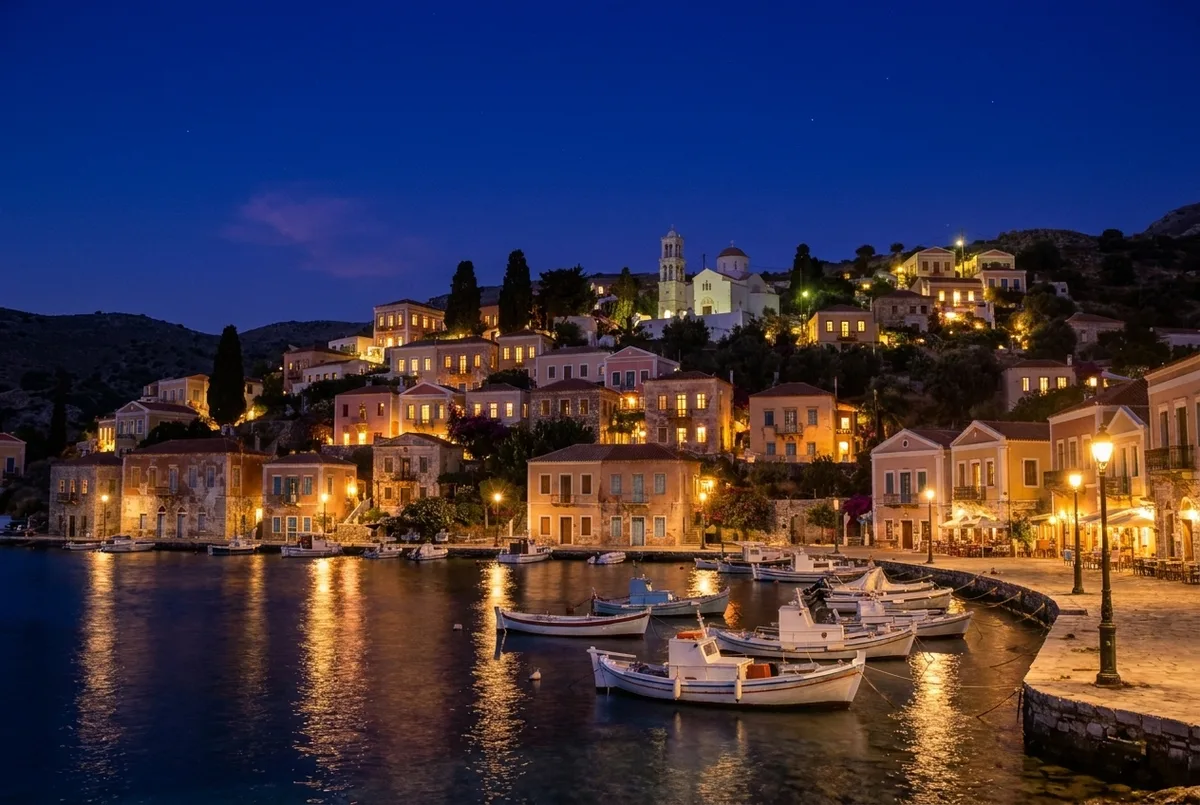
After: City Lights style, Nano Banana Pro, 1K, 51 credits.
What worked: it reads as a real night photo. Windows glow at different strengths, the lamps on the quay throw warm pools of light, and the harbour picks up long reflections. The bell tower, the cypress trees and the boats all stayed where they were.
What changed that we did not ask for: the model added restaurant tables and umbrellas on the quay and a few extra lamp posts. That is fine for a mood shot. For a property listing or a real business, it is a problem, so check every added detail against the real place.
Convert your own day photo to night. Photos with buildings and lamps give the model something to light.
Step by step
- Pick a photo with light sources. Windows, street lamps, signs, car headlights. An empty field has nothing to switch on, so it just goes dark.
- Match the style to the place. City Lights for streets and buildings. Moonlit for beaches, lakes and open country. Starry Night for remote landscapes. Neon Night for dense city streets.
- Name the lights in the optional prompt. "Warm lit windows, street lamps along the path, reflections on the wet road." This is the most useful thing you can add.
- Keep the composition. If something important moved, add "keep the building and framing unchanged" and run it again.
- Run the checklist below.
- Finish in an editor. Remove anything the model invented in the Oakgen image editor, and upscale with the image upscaler if you need a bigger file.
The believable-night checklist
We use this to decide whether a result is good enough to publish. It works for any tool.
| Check | What a real night looks like | Fix if it fails |
|---|---|---|
| Light sources | Every bright area has a visible source: a window, a lamp, a sign | Name the sources in the prompt |
| Sky | Darker at the top than near the horizon; stars only away from city glow | Use Moonlit, or the Sky Replacer, for the sky only |
| Shadows | Shadows fall away from lamps, not from where the sun was | Run it again; daytime shadows mean the relight failed |
| Reflections | Water, glass and wet ground mirror the lights | Add "reflections in the water" or "wet street" |
| Colour mix | Warm tungsten windows against a cool blue sky | Ask for "warm windows, cool blue night" |
| Invented details | Nothing the real place does not have | Remove extras in an editor; never ship them in a listing |
| Noise and detail | Some softness is fine; plastic smoothness is not | Try another model or a higher resolution |
Night sky photo editor or full night conversion?
If the foreground already looks right and you only want a dramatic sky, do not relight the whole photo. Oakgen's Sky Replacer has Starry Night and Northern Lights options, and it leaves the rest of the scene alone. If you want dusk instead of full night, the Time of Day Changer has Golden Hour and Blue Hour. Use Day to Night only when the whole scene should be lit as night.
Common mistakes
- Starting from a photo with no lights. The model has nothing to switch on, so you get a dark, flat image.
- Stars over a city. Bright city light hides most stars. Use City Lights or Neon in town and Starry Night in the countryside.
- Leaving daytime shadows. Hard sun shadows in a night scene give it away at once. Run it again.
- Not checking invented details. Models add lamps, tables and signs. For real estate or a real venue, remove anything that is not really there, and follow your platform's rules on edited photos.
- Over-darkening. Real night photos are exposed so you can see things. If the shadows are pure black, ask for "bright night photo, long exposure look."
What it costs
At 1K on 2026-11-16, Oakgen's pricing returned 51 credits for Nano Banana Pro, 28 for Nano Banana 2 and 72 for GPT Image 2. The tool shows the price before you generate. Oakgen has no free plan; see pricing.
Related reading
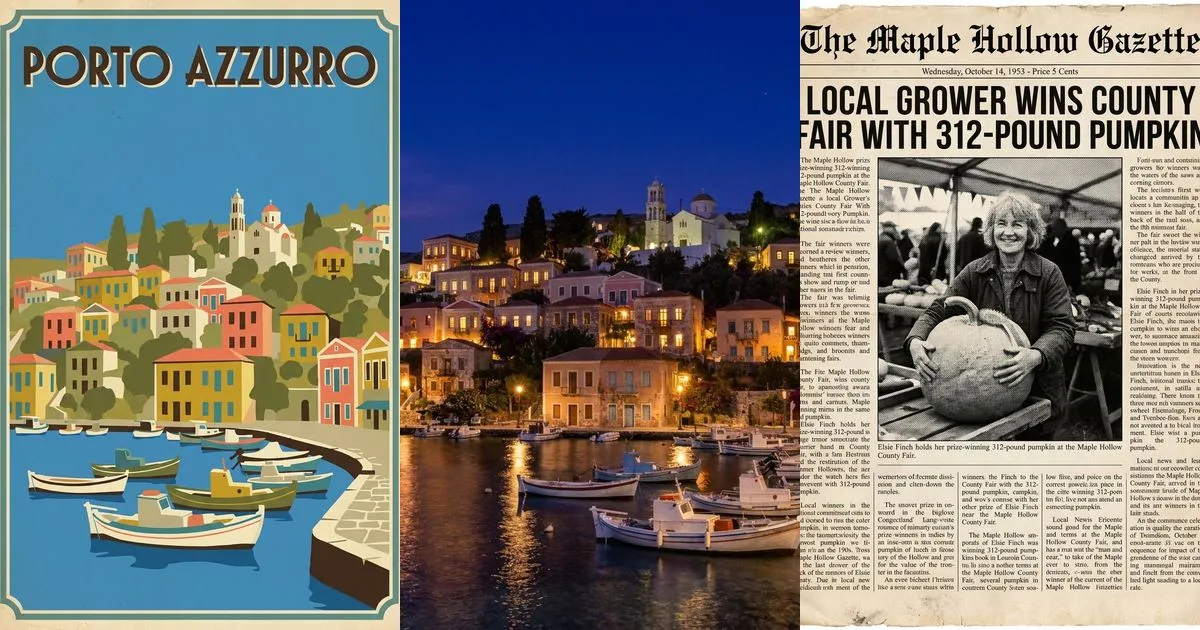
The same harbour photo became a 1920s poster in our guide to turning a photo into a vintage travel poster. Try a night version as a poster too. For a printed-news look, see the newspaper generator with photo. All ten effects in this series are in the AI photo effects guide.
If you have a daytime shot that would look better after dark, turn it into a night scene in Oakgen and run the checklist before you post it.
Frequently asked questions
How do I convert a day photo to night with AI?
Upload the daytime photo to a day to night converter such as Oakgen's Day to Night template, pick a night style (City Lights, Moonlit, Starry Night or Neon Night) and generate. A good result adds light sources such as lit windows and street lamps, instead of just darkening the photo.
Why does my AI night photo look fake?
Usually because nothing in the scene emits light. Real night photos are lit by windows, lamps, signs and reflections. Name those light sources in the prompt, pick a photo that has buildings or lamps in it, and choose a style that matches what is there.
Can AI add a starry night sky to a photo?
Yes. Oakgen's Day to Night template has a Starry Night style, and its Sky Replacer template has a Starry Night sky option if you only want to change the sky. Stars look most believable over countryside or water, away from bright city light.
Is day to night AI good for real estate photos?
It is widely used to make twilight versions of exterior shots. Check your listing platform's or MLS's rules on edited photos, and do not add features the property does not have, such as garden lights that are not installed.
What is the difference between day to night and time of day tools?
Oakgen's Day to Night template is built only for night and has four night moods. The Time of Day Changer covers sunrise, morning, midday, golden hour, blue hour and night, so use it for dusk or blue hour.
How much does day to night conversion cost on Oakgen?
On 2026-11-16 at 1K, a render cost 51 credits on Nano Banana Pro (the default), 28 on Nano Banana 2 and 72 on GPT Image 2. Oakgen has no free plan.
Sources
- Oakgen Day to Night Converter template definition (read 2026-11-16)
- Media.io AI Day to Night Photo Converter (read 2026-11-16)
- Dreamina Day to Night converter (read 2026-11-16)
- Sirv AI Studio Day to Night (read 2026-11-16)
- Mew Design AI Day to Night Photo Converter (read 2026-11-16)
- Oakgen pricing (read 2026-11-16)