This is a complete walkthrough of the AI Image Generator on Oakgen.ai. Every feature, every setting, explained with screenshots.
Interface Overview
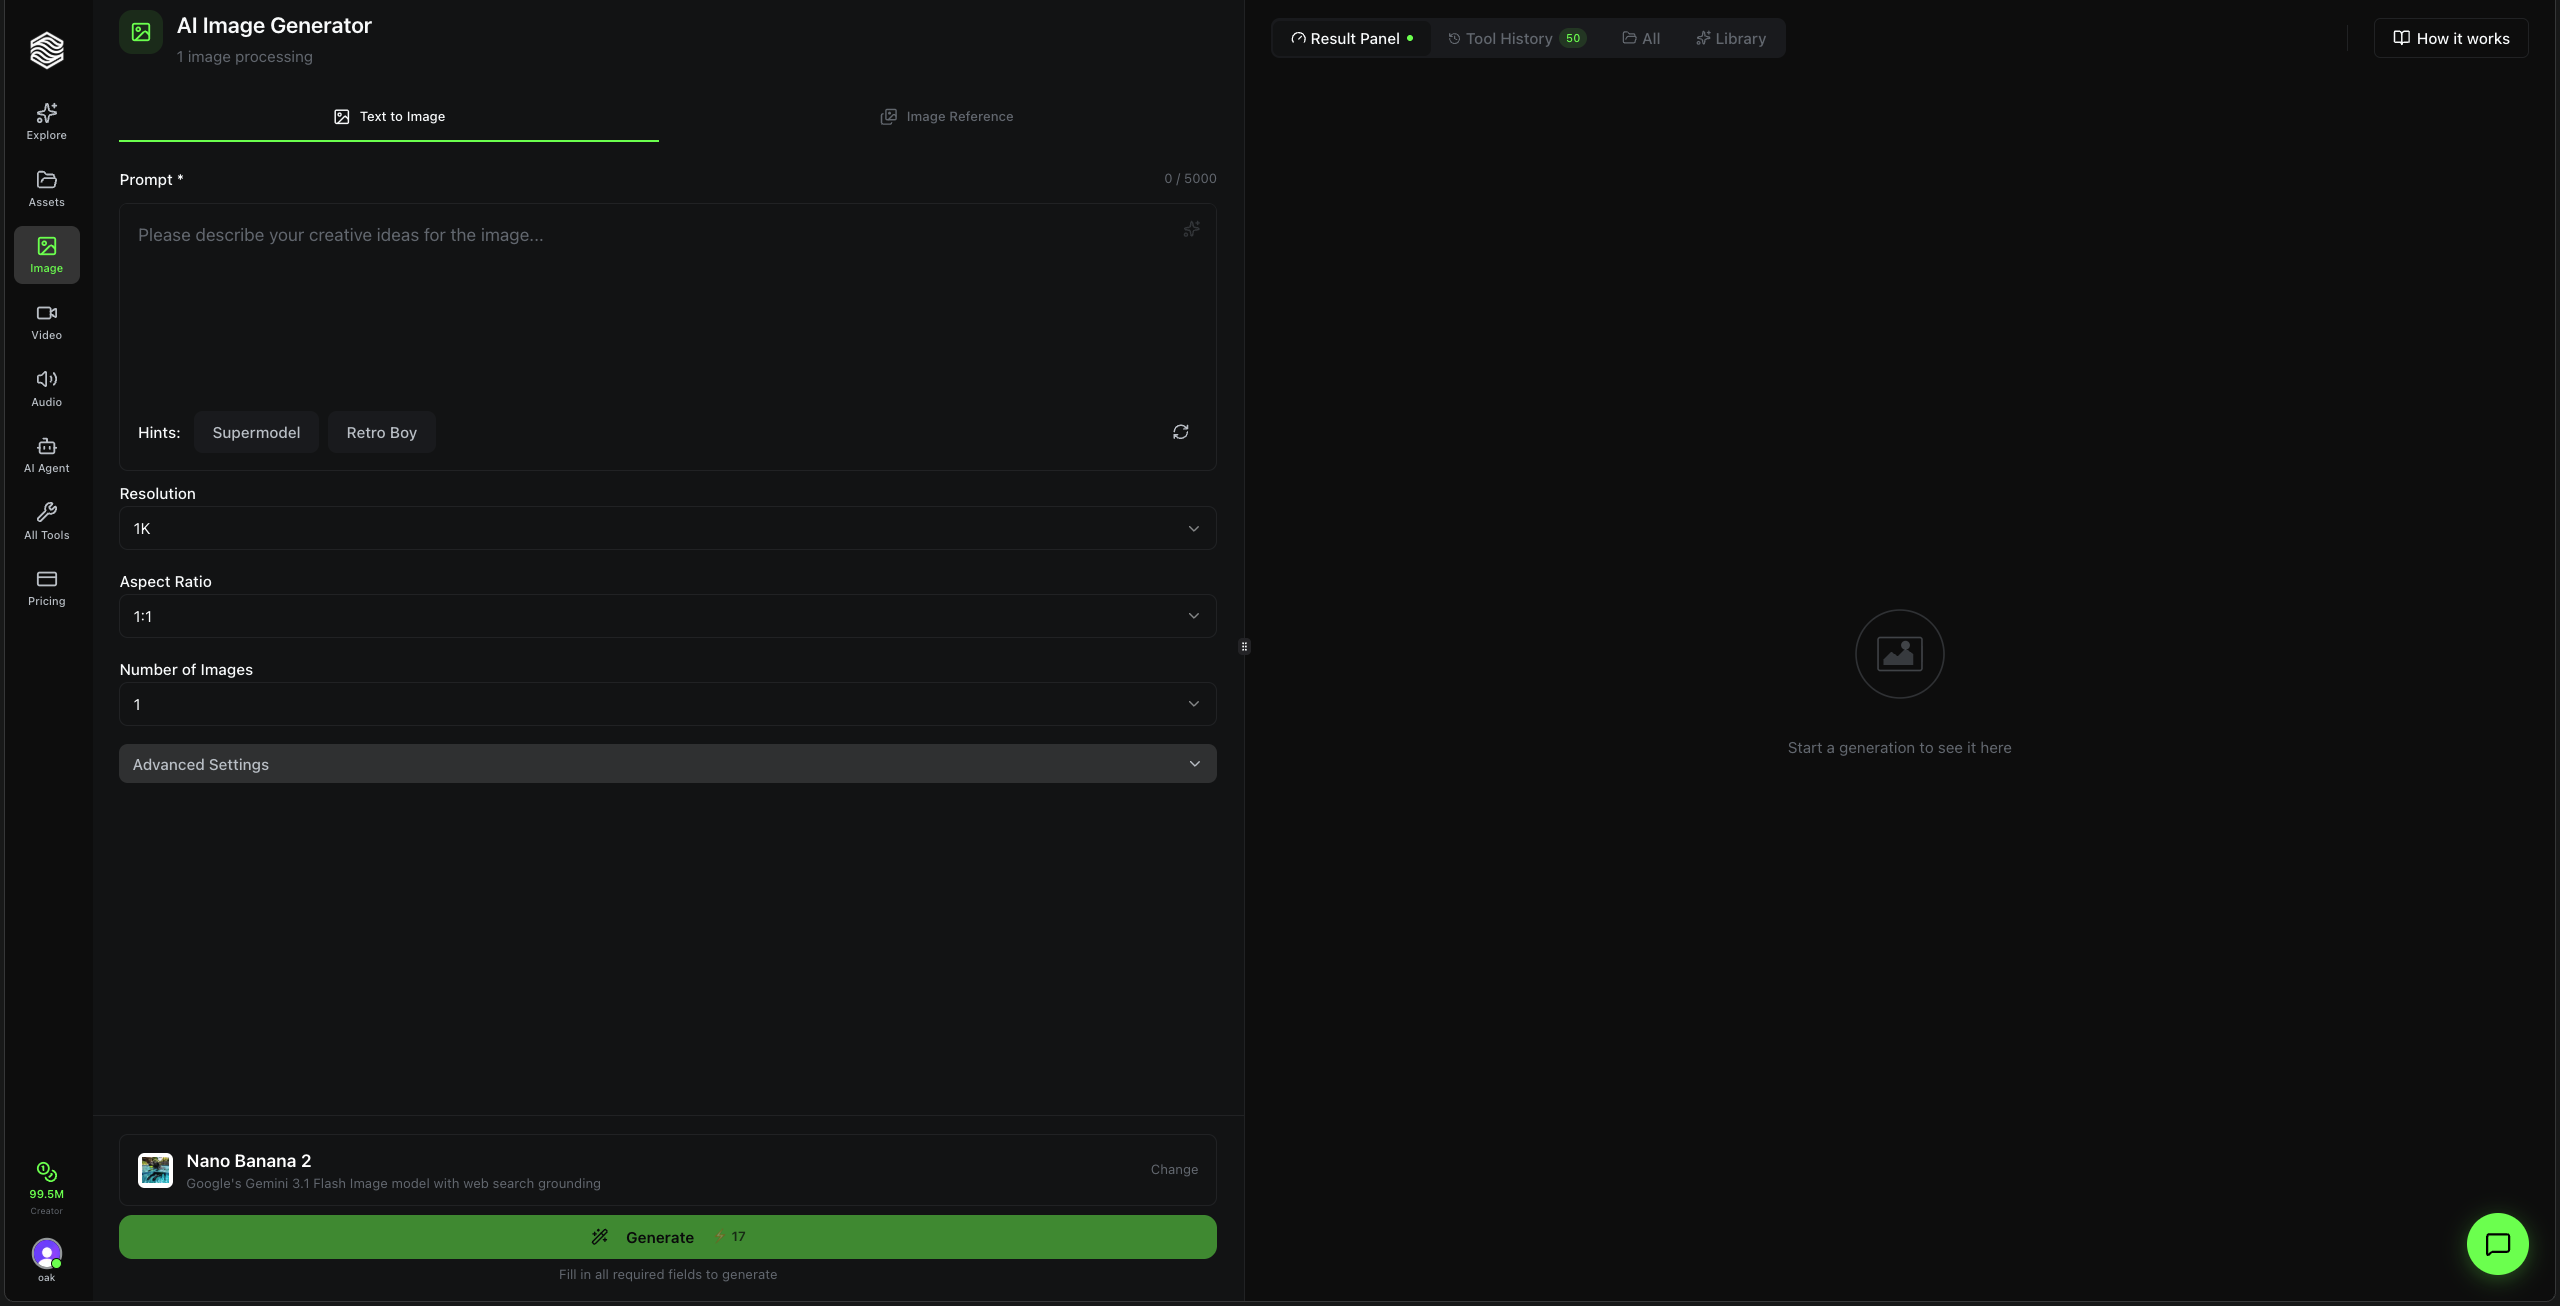
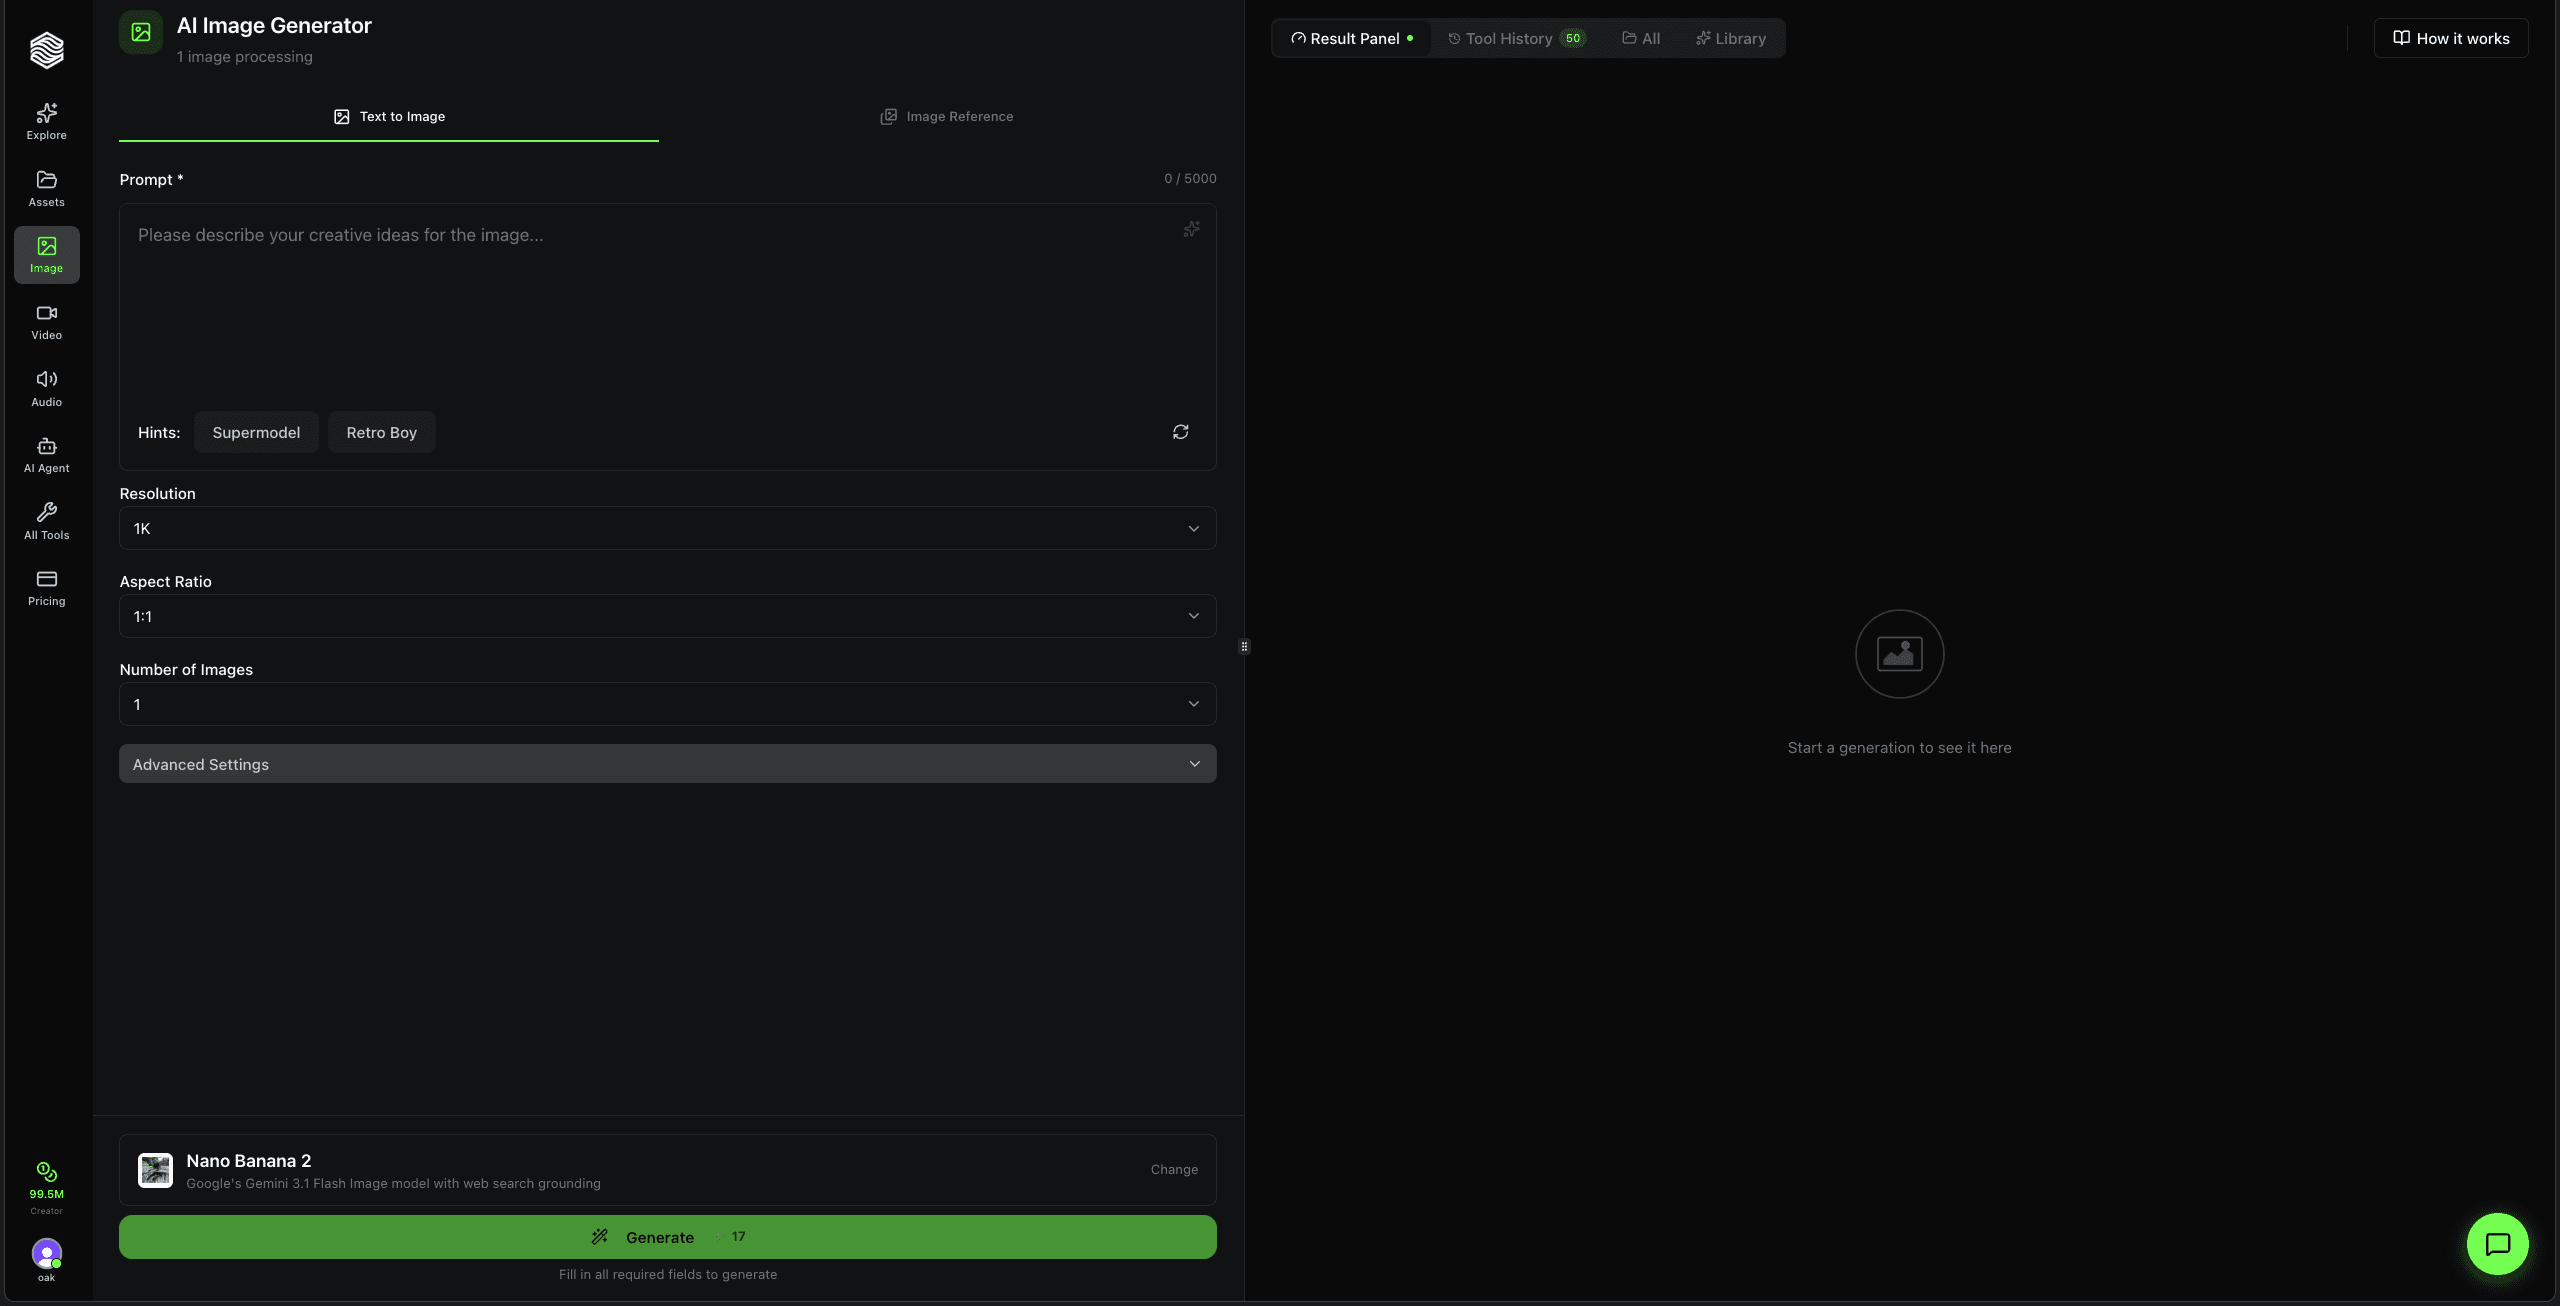
The Image Generator has two main areas:
- Left panel -- Your controls: prompt, settings, model selector, and the Generate button.
- Right panel -- Your results: generated images, full tool history, and your saved library.
At the top of the right panel, you can switch between:
- Result Panel -- Shows your latest generation
- Tool History -- Every image you have generated (with count)
- All -- All generations across all tools
- Library -- Images you have saved
Two Generation Modes
The Image Generator supports two input modes, accessible via the tabs at the top:
Text to Image
Type a text prompt and the AI creates an image from scratch. This is the default mode.
Image Reference
Upload one or more reference images and the AI generates new images based on them. Use this for style transfers, edits, inpainting, or when you want the output to match a specific look.
Writing a Prompt
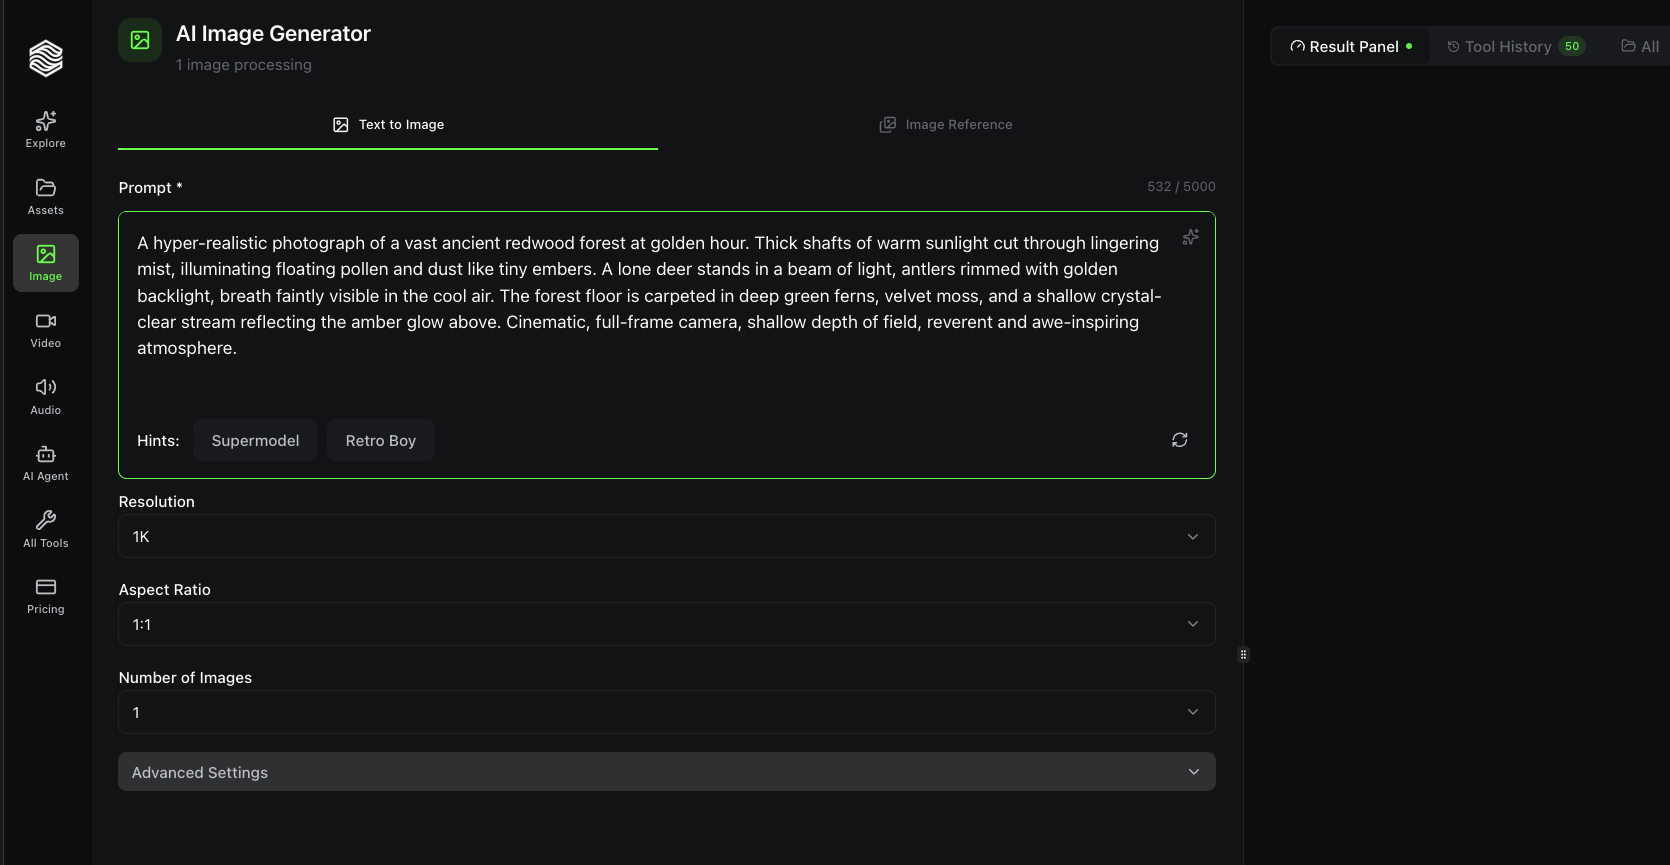
The prompt box accepts up to 5,000 characters. Describe the subject, scene, lighting, style, and composition you want.
Hints are provided below the prompt box -- click suggestions like Supermodel or Retro Boy to instantly fill in a detailed example prompt. Hit the refresh icon to get new hint suggestions.
The sparkle icon (top-right of the prompt box) enhances your prompt with AI -- it expands a basic description into a detailed, model-optimized prompt.
Be specific about style, lighting, and composition. Terms like "cinematic, shallow depth of field, golden hour" or "flat illustration, bold colors, minimalist" help the AI understand exactly what you want.
Settings
Resolution
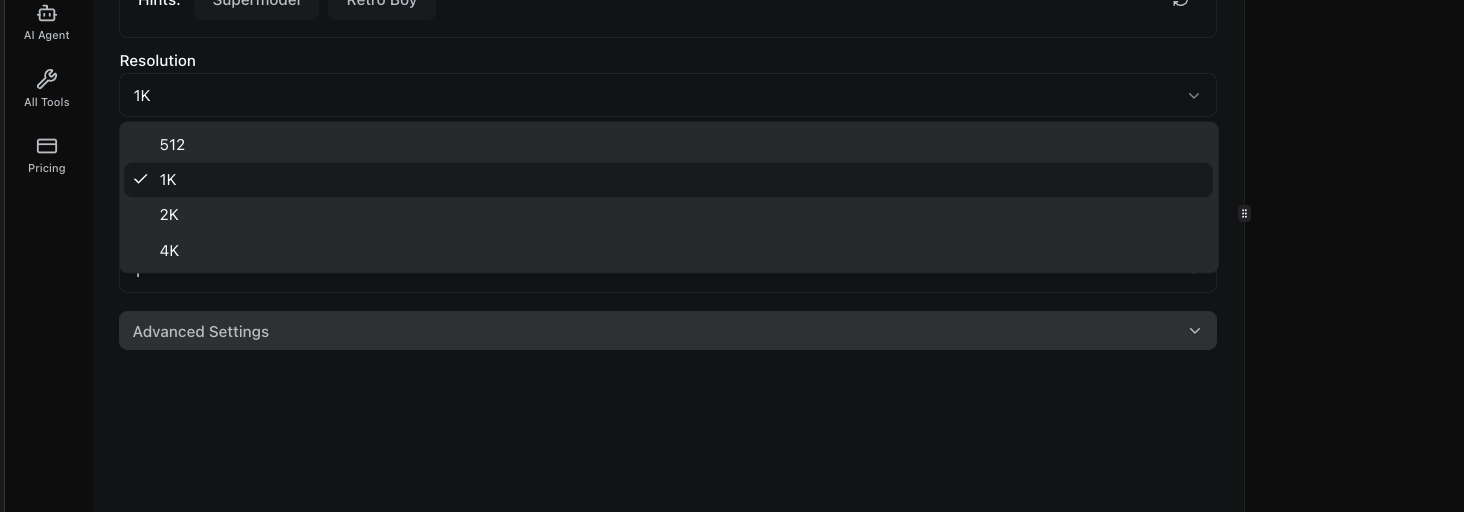
Select the output resolution of your image:
| Resolution | Best For |
|---|---|
| 512 | Quick drafts, fast iteration |
| 1K | Default. Good balance of quality and speed |
| 2K | High-quality prints and detailed work |
| 4K | Maximum detail, large format output |
Resolution options may vary by model. Higher resolutions cost more credits.
Aspect Ratio
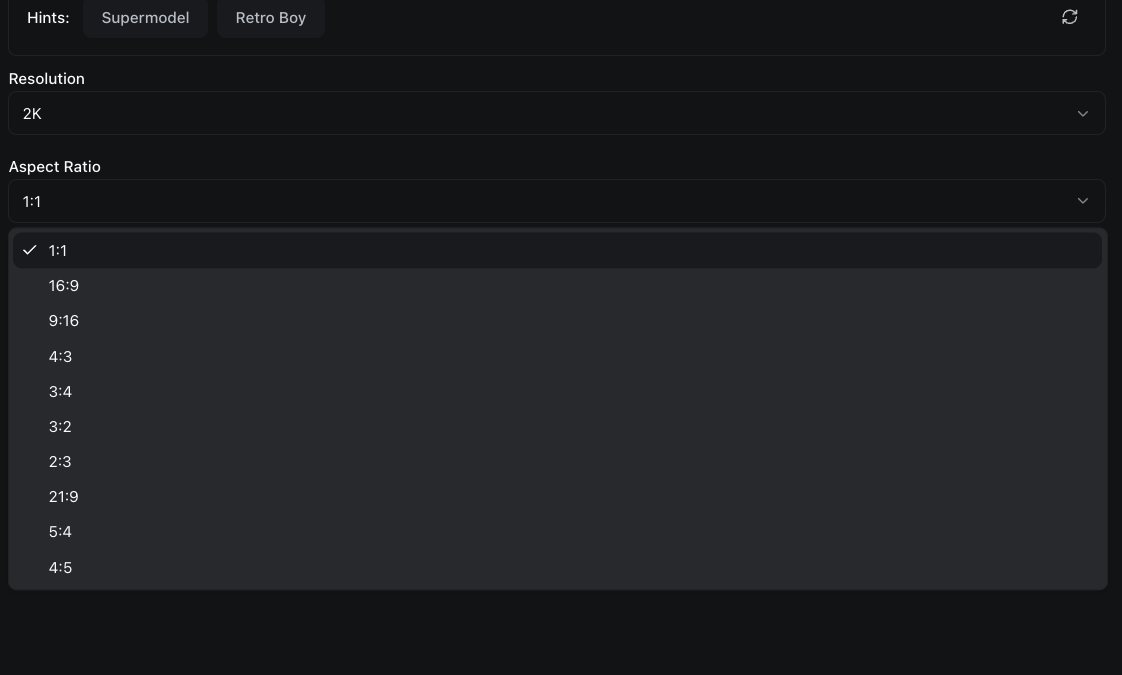
Choose the frame shape for your image:
| Aspect Ratio | Best For |
|---|---|
| 1:1 | Social media posts, profile pictures |
| 16:9 | Website banners, YouTube thumbnails |
| 9:16 | Instagram Stories, TikTok, phone wallpapers |
| 4:3 | Presentations, standard photos |
| 3:4 | Portrait photography |
| 3:2 | Classic photo format |
| 2:3 | Tall portraits |
| 21:9 | Ultra-wide cinematic frames |
| 5:4 / 4:5 | Square-adjacent formats |
Set this before generating. Cropping after the fact loses content.
Number of Images
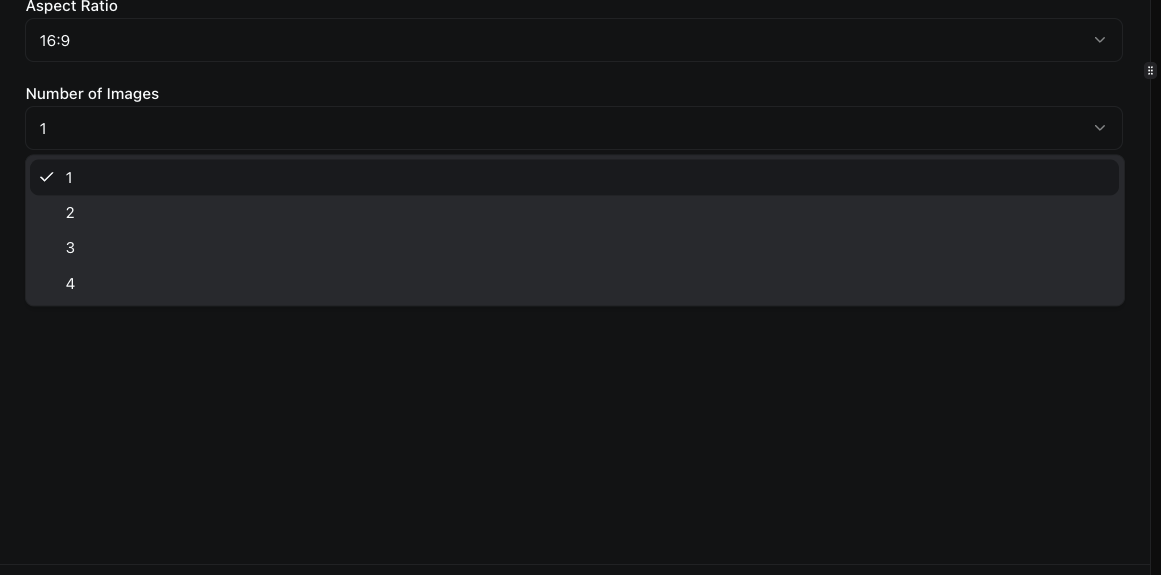
Generate 1 to 4 images per prompt in a single batch. Each additional image costs extra credits, but this is the fastest way to explore variations of the same prompt.
Generating 4 images at once is more efficient than running the same prompt 4 times. You get all variants in one result card and can quickly pick the best one.
Selecting an AI Model
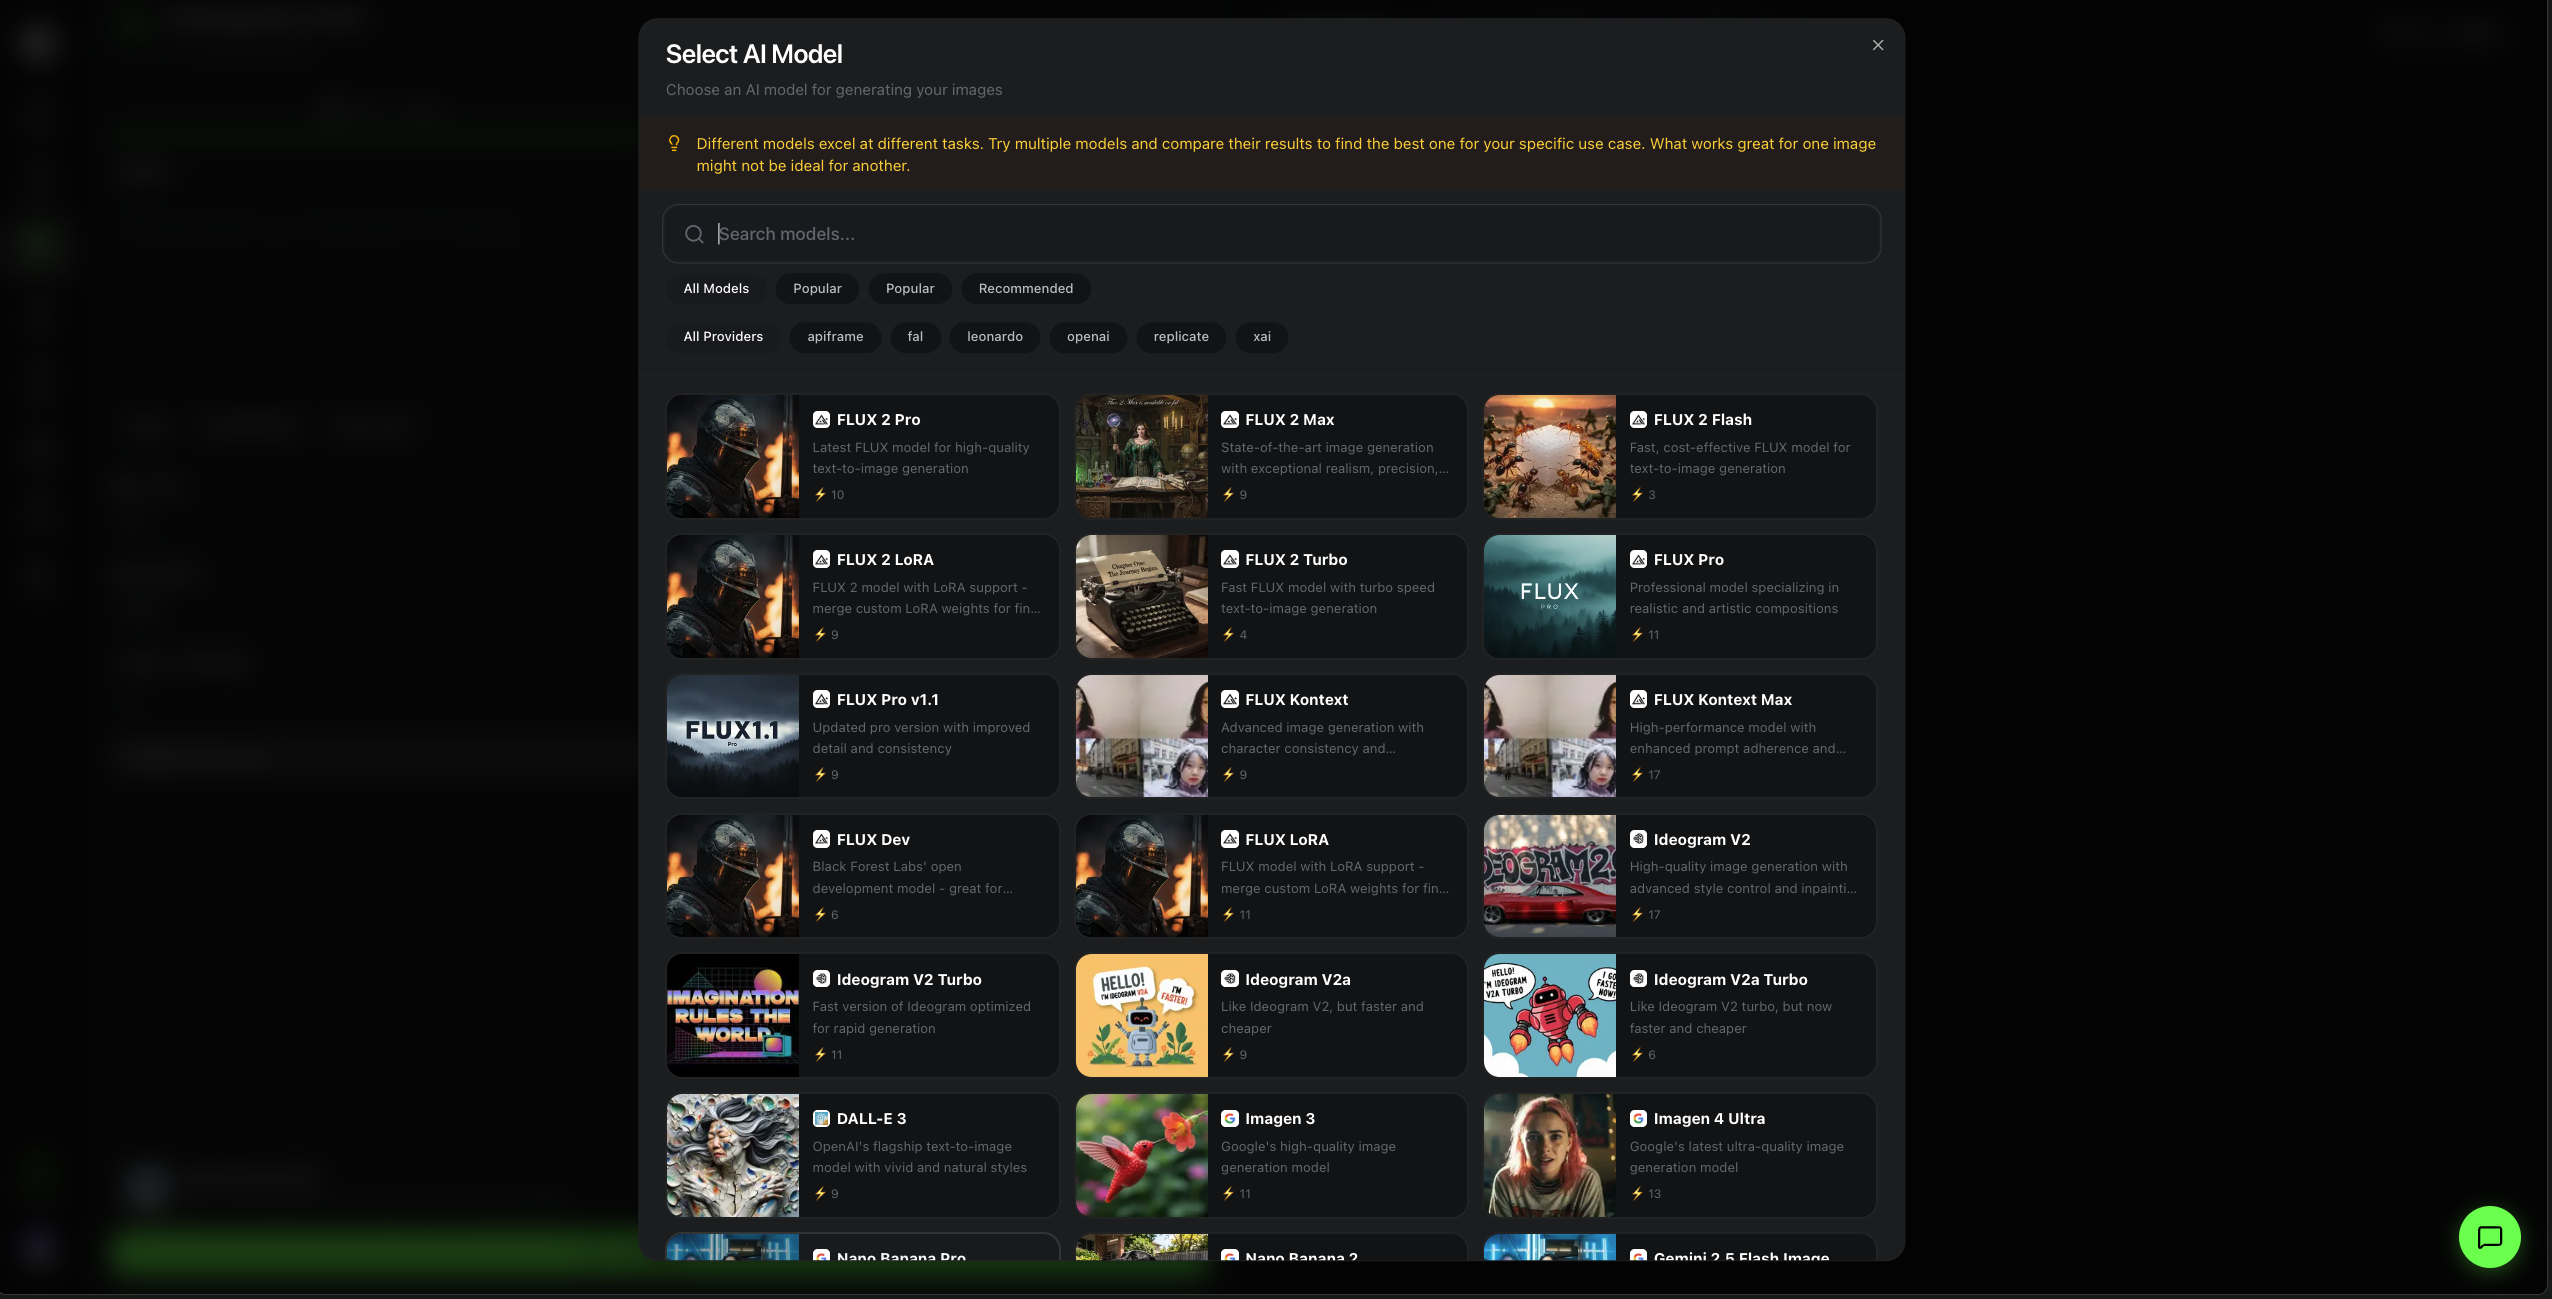
Click Change next to the current model name to open the model selector. Oakgen offers 20+ AI image models from top providers.
Filtering Models
Use the tabs and filter chips to narrow your search:
- All Models -- Browse everything
- Popular / Recommended -- Quick category filters
- Provider filters -- FLUX, Ideogram, Recraft, Luma, Google, OpenAI, ByteDance, and more
- Search bar -- Type a model name to find it instantly
Featured Models
| Model | Provider | Strength |
|---|---|---|
| FLUX 1.1 [pro] | Black Forest Labs | Fast, high-quality general purpose |
| FLUX 1.1 [pro] ultra | Black Forest Labs | Maximum quality, ultra-high resolution |
| Ideogram V3 | Ideogram | Best text rendering in images |
| GPT Image 1 | OpenAI | Strong prompt adherence, versatile |
| Recraft V3 | Recraft | Excellent for design and illustration |
| Luma Photon | Luma | Fast and affordable |
| Seedream V4 | ByteDance | Great value at low cost |
| Nano Banana Pro | Gemini 3 Pro with web search grounding | |
| Hunyuan V3 | Tencent | High detail, photorealistic |
| Reve | Reve | Creative, artistic outputs |
Each model card shows a preview thumbnail, name, and a short description so you can quickly compare.
Different models interpret the same prompt differently. Spend a few credits testing 2-3 models with your prompt to find the best fit for your specific use case.
Generating and Viewing Results

Click Generate to start. The button shows the credit cost (e.g., 17 credits). The status bar updates to show "1 image processing."
Once your image is ready, it appears in the Result Panel on the right. Each result card shows:
- The generated image as a thumbnail
- The prompt text (truncated)
- The model name and generation date
- Download and options buttons on hover
You will also receive a real-time notification when the image is complete, so you do not need to stay on the page.
Library Quick Actions

Click on any generated image to open it in full-screen detail view. On the right side, you will see:
- Prompt -- The full text prompt used to generate the image
- Tags -- Category and type labels
- Generation info -- Model name, date, creation time, and related models
At the bottom of the detail view, there are five quick action buttons:
| Action | What It Does |
|---|---|
| Upscale | Opens the image in the AI Image Upscaler with the URL pre-filled |
| Edit | Opens the image in the AI Image Editor |
| Share to Library | Makes the image public in the community library |
| Download | Saves the full-resolution image to your device |
| Save | Bookmarks the image to your personal library |
These quick actions let you take your generated image further without leaving the Oakgen workflow.
Image Upscaler

When you click Upscale from the detail view, the image is sent directly to the AI Image Upscaler tool with the URL pre-filled. No need to download and re-upload.
The Upscaler settings include:
- Enhancement Model -- Choose between Standard V2 and other enhancement models
- Upscale Factor -- Slider from 1x to 4x (how much to enlarge the image)
- Face Enhancement -- Toggle on for portraits to improve facial detail
- Advanced Settings -- Additional fine-tuning options
Click Change at the bottom to switch between upscaling models:
| Model | Best For |
|---|---|
| Topaz Upscale | General purpose, face enhancement support |
| Clarity Upscaler | Detail enhancement and sharpening |
| Crystal Upscaler | Portrait optimization |
The upscaled image appears in the right panel, ready to download at full resolution.
Quick Reference
| Feature | Where to Find It |
|---|---|
| Switch modes (Text/Image Reference) | Tabs at the top |
| Write/enhance prompt | Main text area + sparkle icon |
| Set resolution | Settings > Resolution dropdown |
| Set aspect ratio | Settings > Aspect Ratio dropdown |
| Set number of images | Settings > Number of Images dropdown |
| Change AI model | Click "Change" at bottom of left panel |
| View past generations | Tool History tab (right panel) |
| Save an image | Library tab (right panel) |
| Upscale an image | Open image > Upscale button |
| Edit an image | Open image > Edit button |
| See how it works | "How it works" button (top-right) |