This is a complete walkthrough of the AI Video Generator on Oakgen.ai. Every feature, every setting, explained with screenshots.
Interface Overview
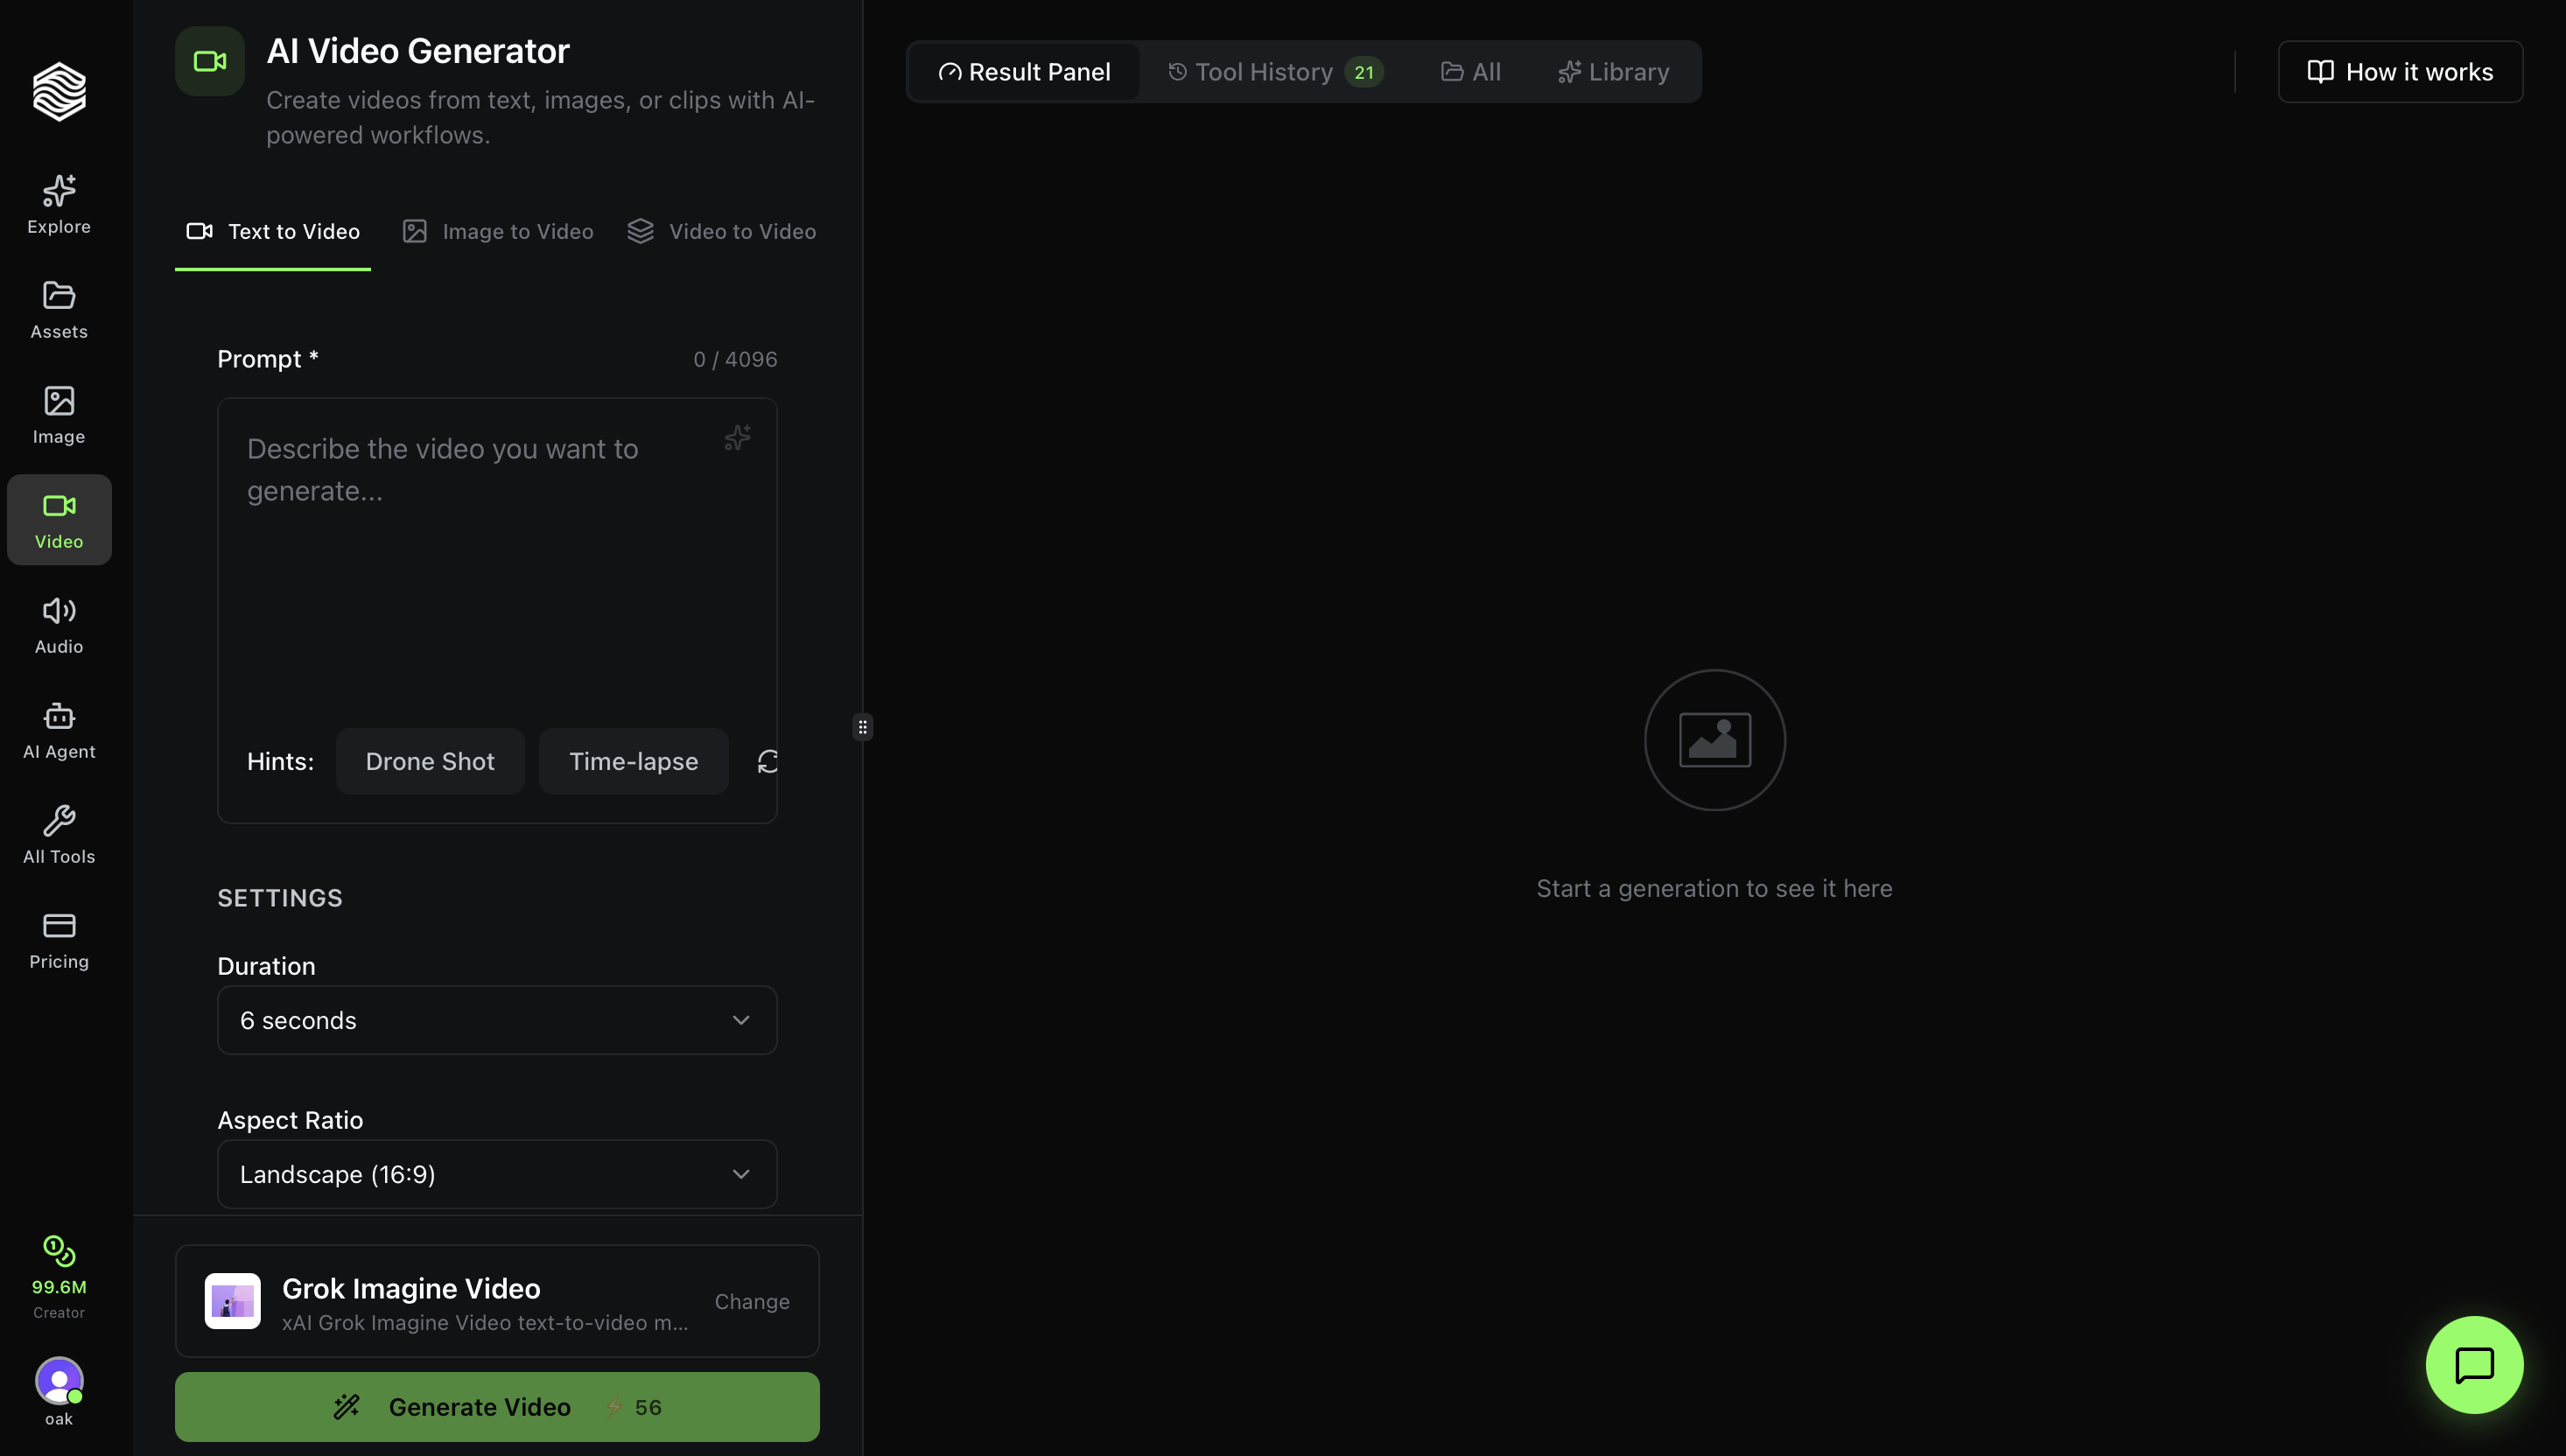
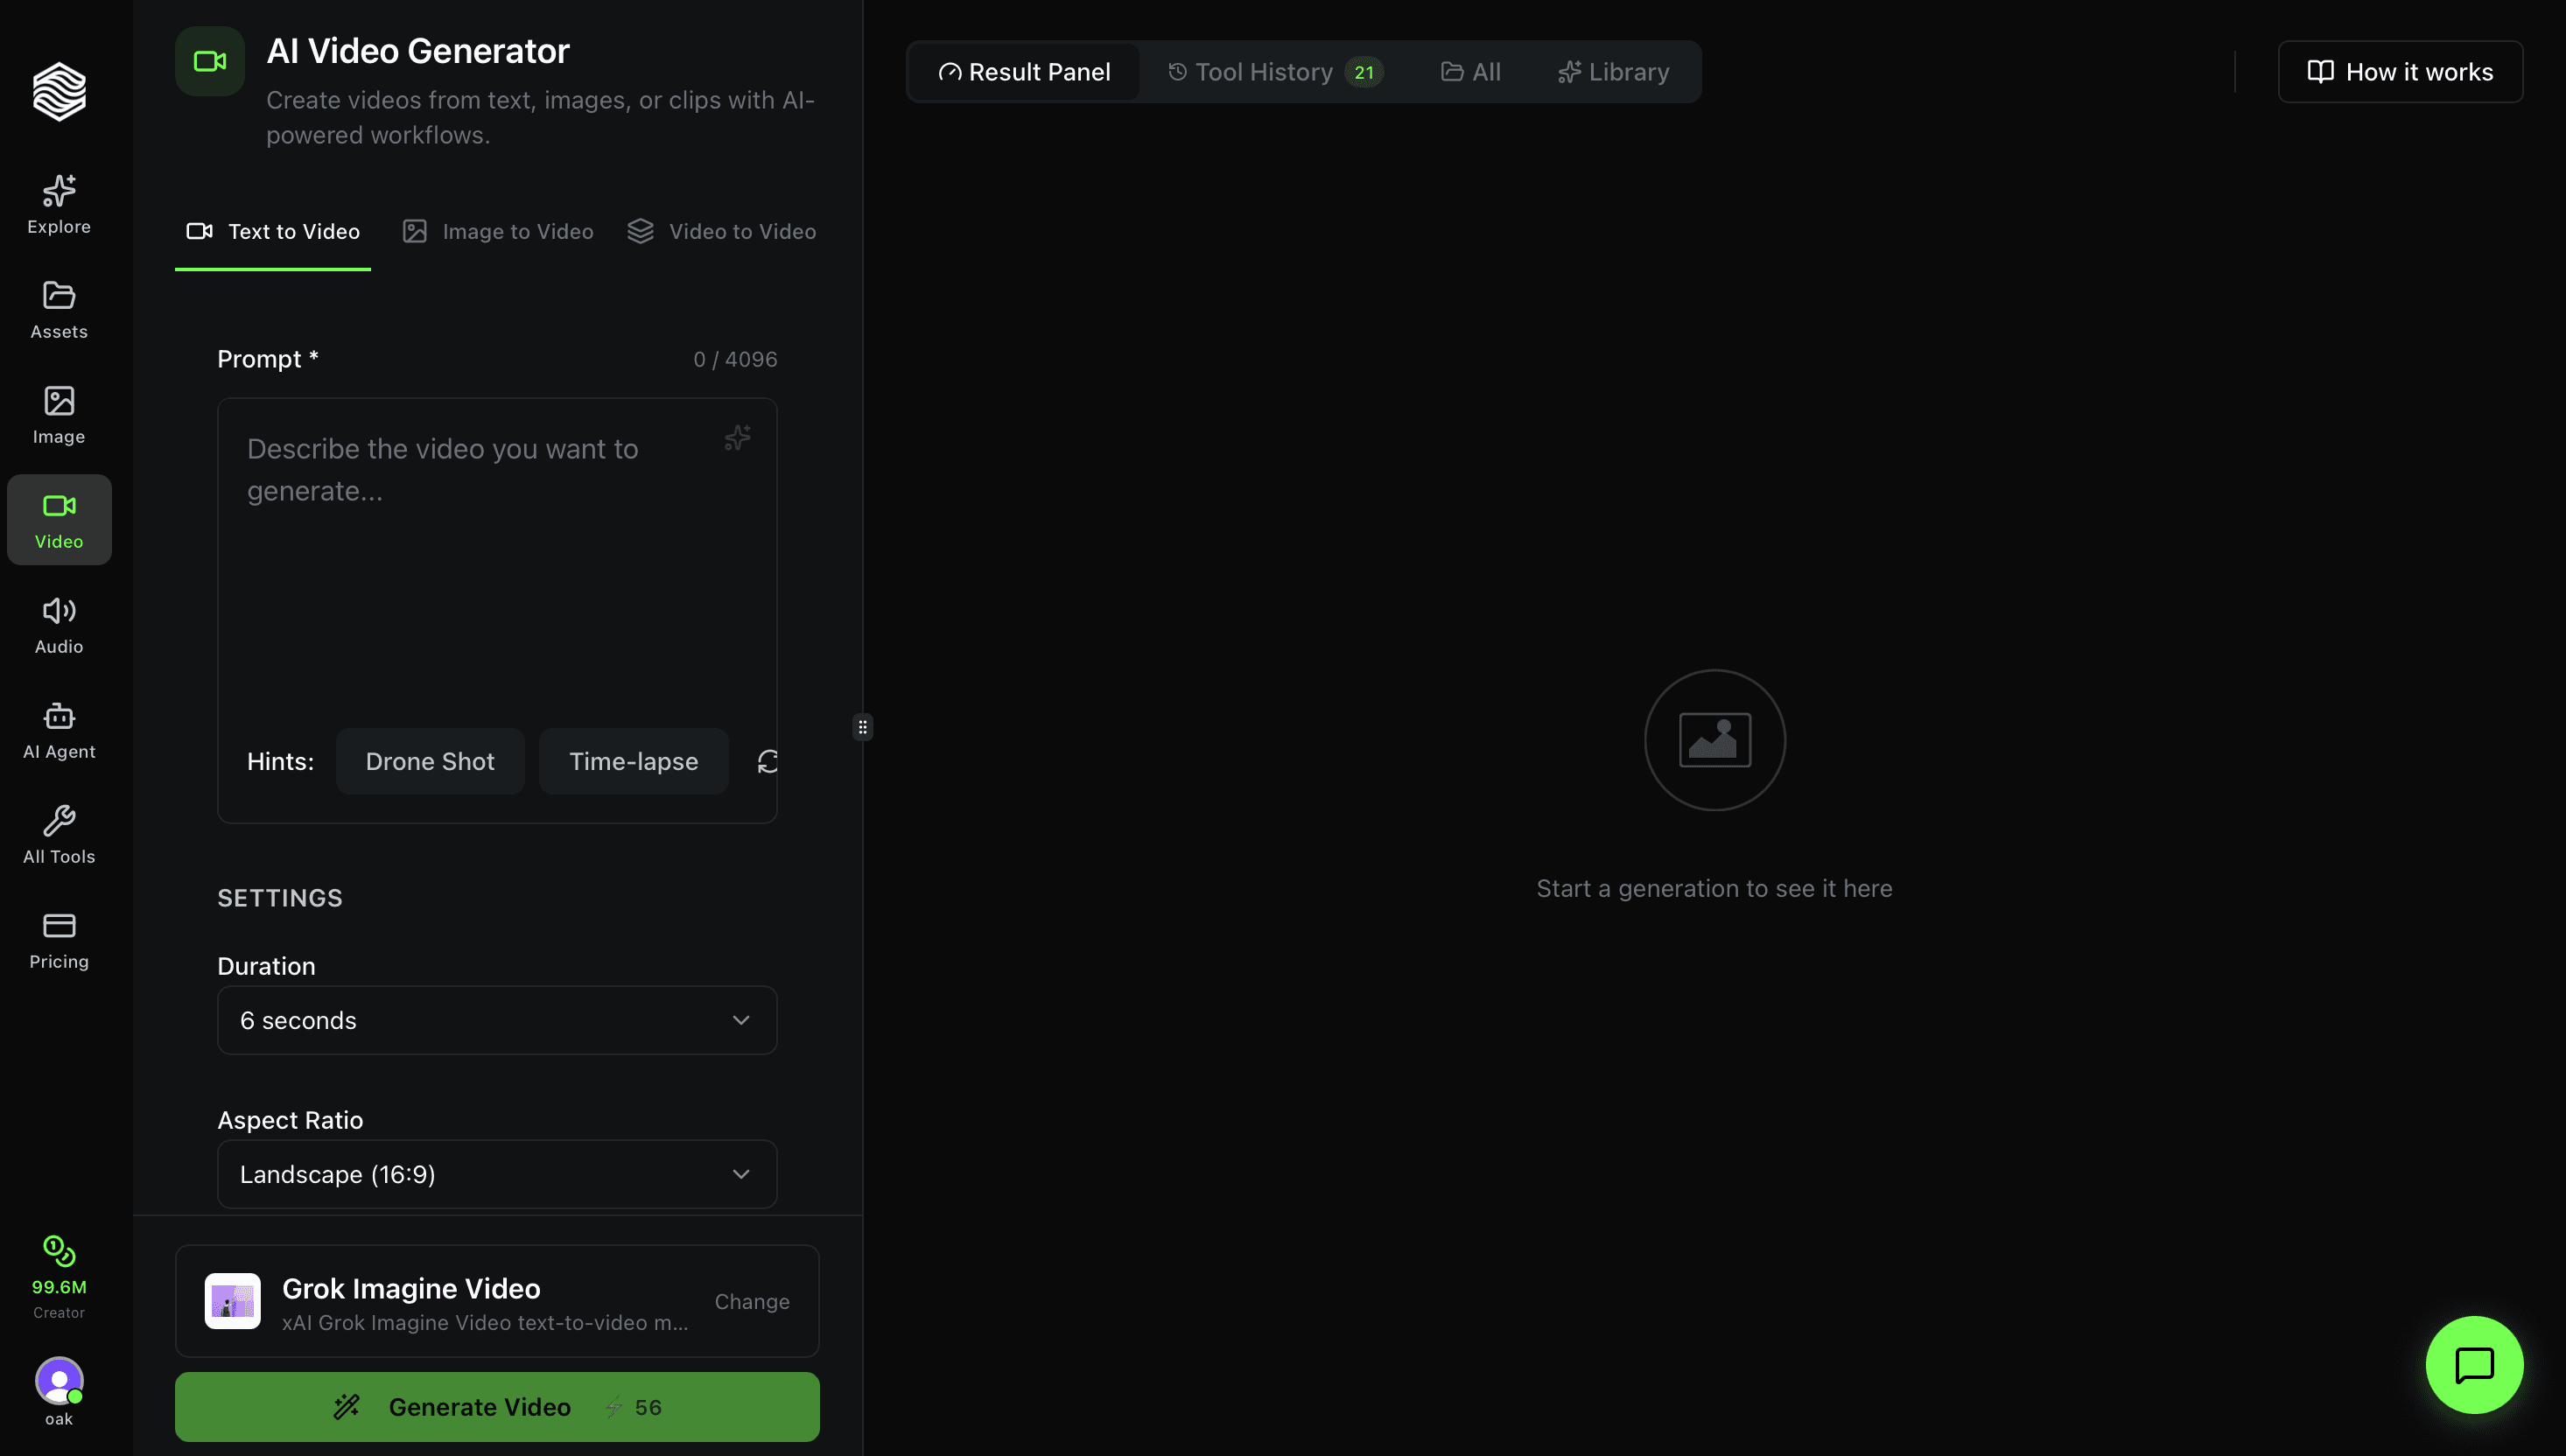
The Video Generator has two main areas:
- Left panel -- Your controls: prompt, settings, model selector, and the Generate button.
- Right panel -- Your results: generated videos, full tool history, and your saved library.
At the top of the right panel, you can switch between:
- Result Panel -- Shows your latest generation
- Tool History -- Every video you have generated (with count)
- All -- All generations across all tools
- Library -- Videos you have saved
Three Generation Modes
The Video Generator supports three input modes, accessible via the tabs at the top:
Text to Video
Type a text prompt and the AI creates a video from scratch. This is the default mode.
Image to Video
Upload a still image and the AI animates it. Use this when you want precise control over the starting frame -- great for product shots, AI-generated images, or design mockups.
Video to Video
Upload an existing video clip and the AI transforms it with a new style, enhanced quality, or modified motion. Use this to restyle footage or apply AI effects to existing content.
Writing a Prompt
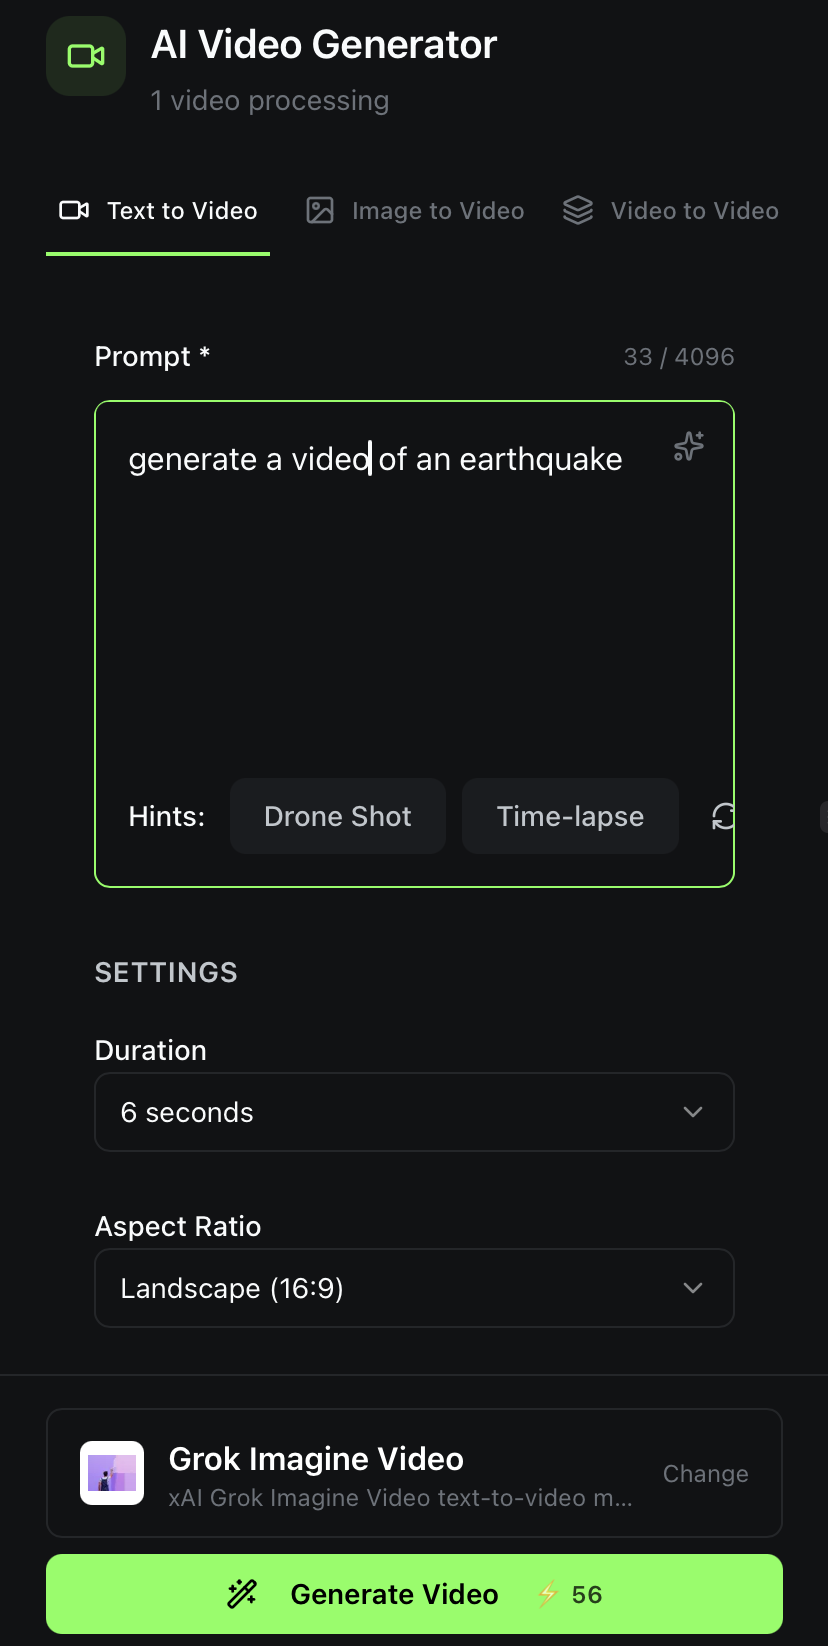
The prompt box accepts up to 4,096 characters. Describe the scene, motion, camera movement, and style you want.
Hints are provided below the prompt box -- click Drone Shot or Time-lapse to instantly add those camera styles to your prompt. Hit the refresh icon to get new hint suggestions.
The sparkle icon (top-right of the prompt box) enhances your prompt with AI -- it expands a basic description into a detailed, model-optimized prompt.
Unlike image prompts, video prompts should describe motion and camera work in addition to the scene. Include terms like "slow pan," "tracking shot," "zoom in," or "timelapse" to control how the camera moves.
Settings
Duration
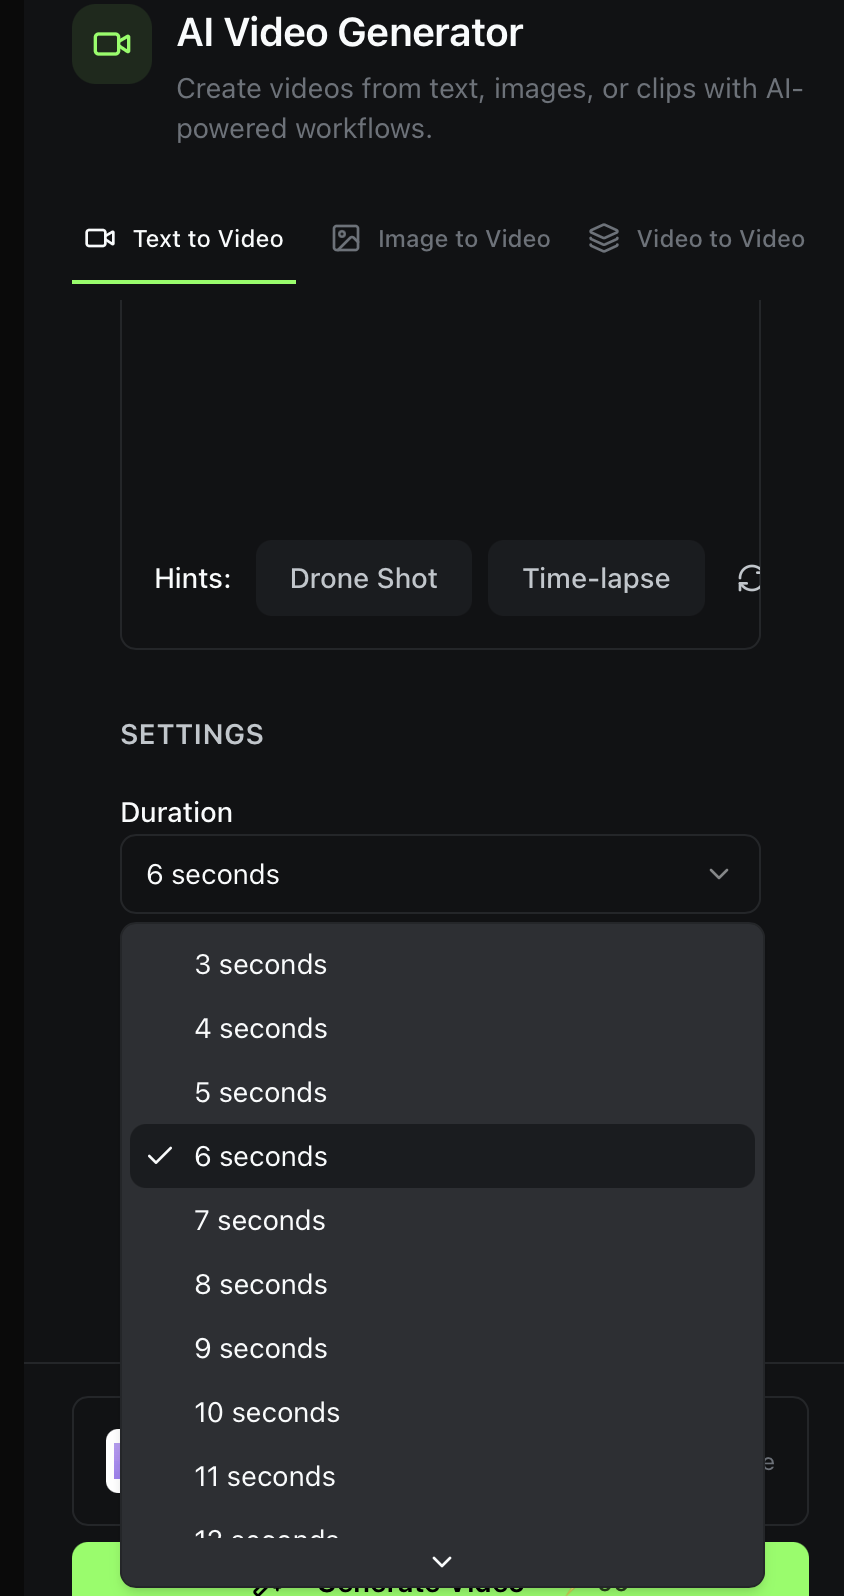
Set how long your video will be. Options range from 3 seconds to 12+ seconds, depending on the model selected. The default is 6 seconds.
- 3-5 seconds -- Social media clips, loops, quick reveals
- 6-8 seconds -- Standard ads, product demos
- 9-12 seconds -- Mini-narratives, longer scenes
Longer videos cost more credits. A 3-second clip may cost half as much as a 10-second one with the same model.
Aspect Ratio
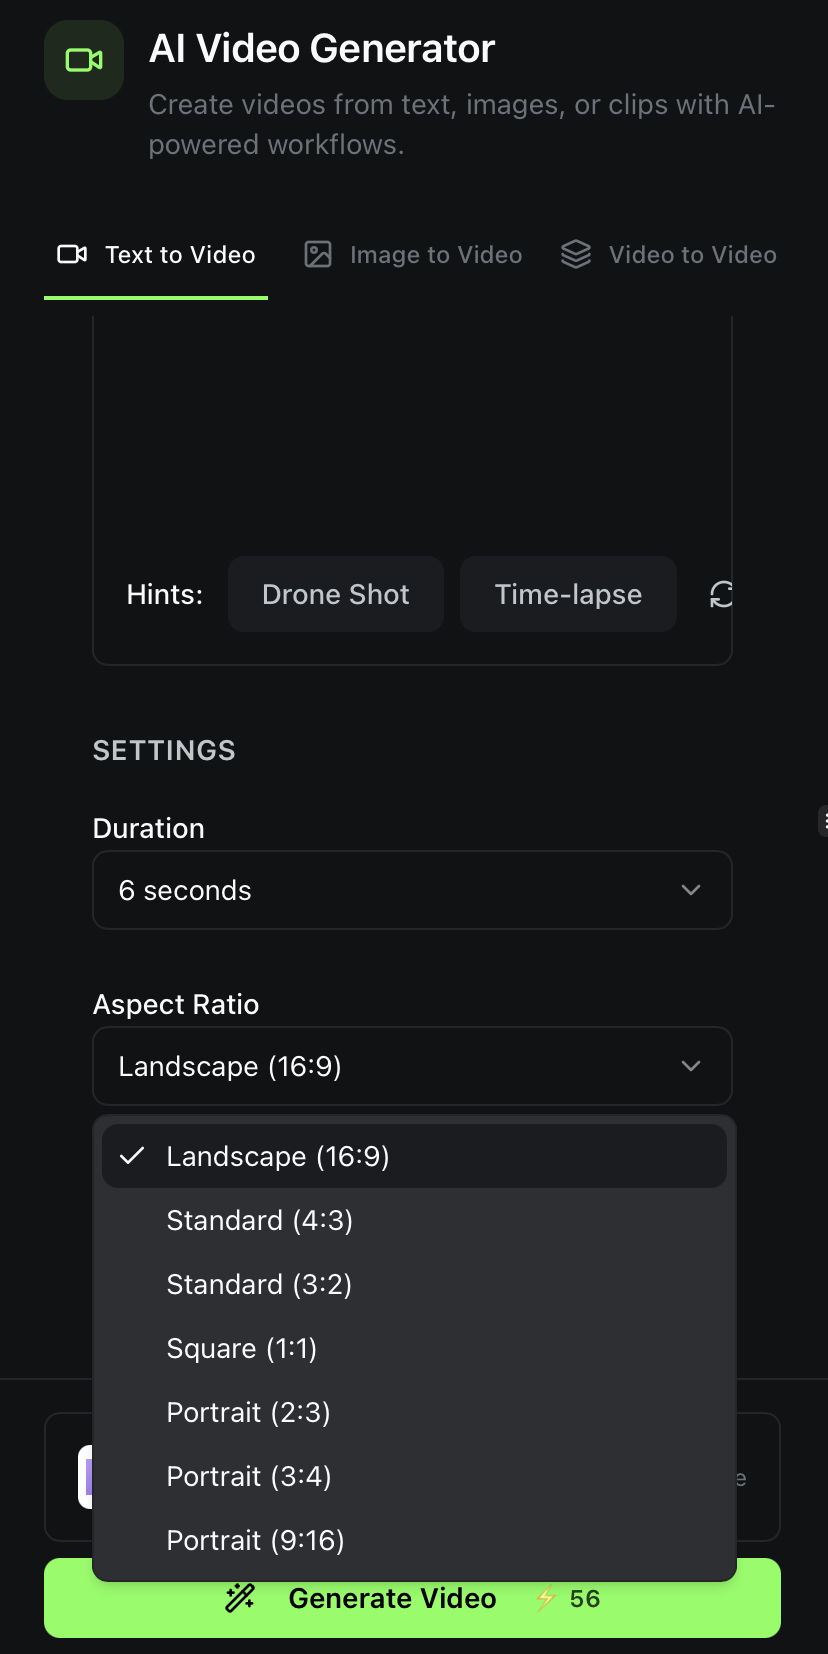
Choose the frame shape for your video. Available options:
| Aspect Ratio | Best For |
|---|---|
| Landscape (16:9) | YouTube, presentations, standard video |
| Standard (4:3) | Traditional video format |
| Standard (3:2) | Photo-style framing |
| Square (1:1) | Instagram feed, social posts |
| Portrait (2:3) | Vertical content |
| Portrait (3:4) | Mobile-friendly vertical |
| Portrait (9:16) | TikTok, Instagram Reels, YouTube Shorts |
Always set this before generating. Cropping a 16:9 video to 9:16 after the fact loses content.
Resolution
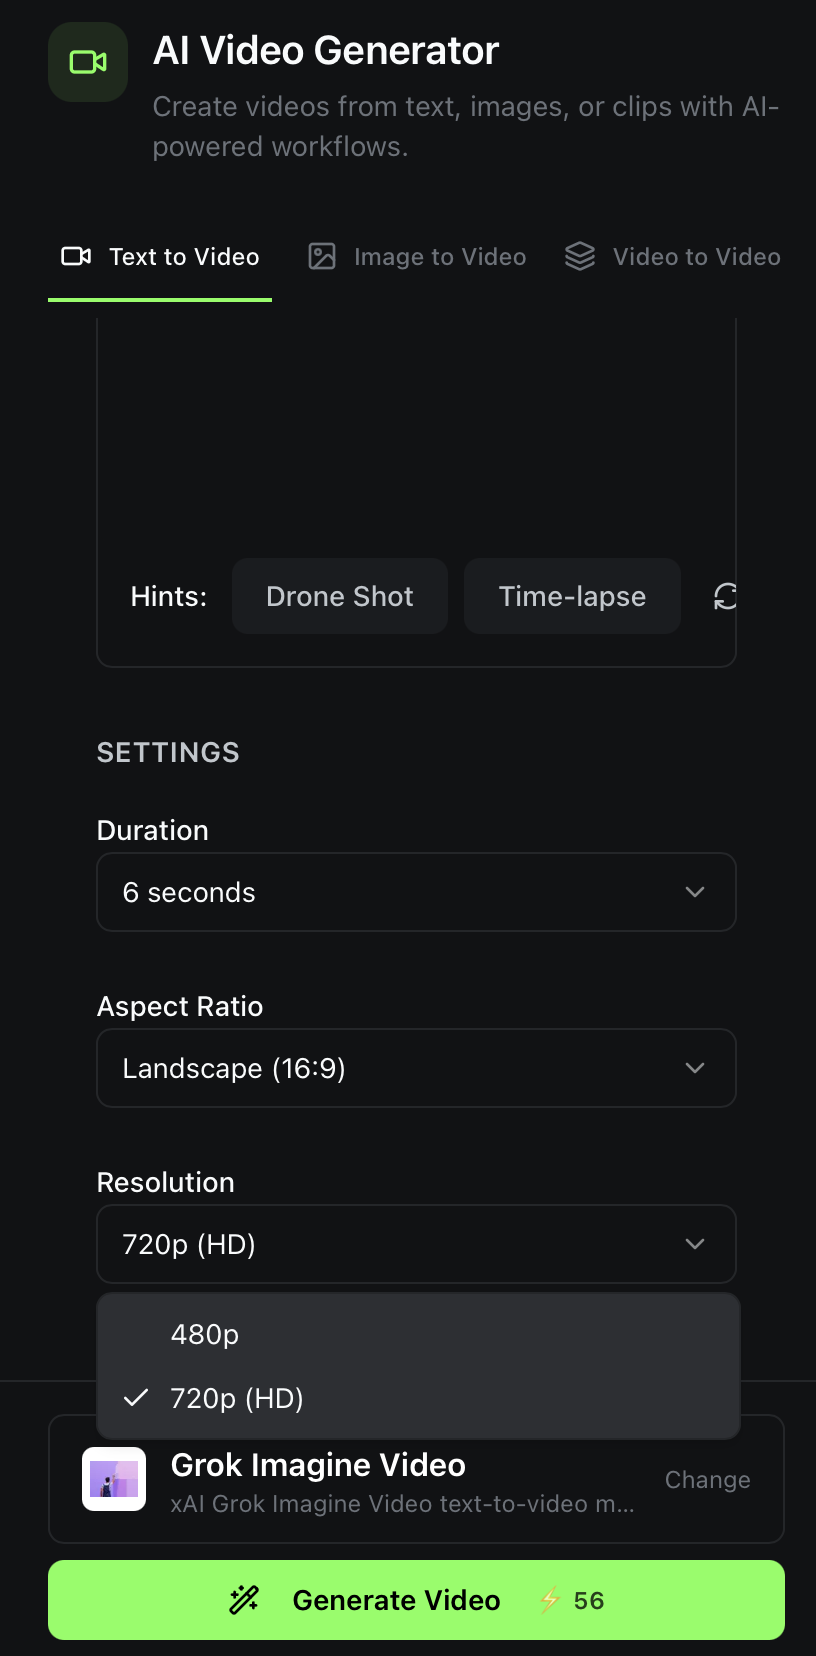
Select the output quality of your video:
- 480p -- Lower resolution, faster generation, fewer credits
- 720p (HD) -- Default. Sharp output suitable for most use cases
Resolution options may vary by model. Some premium models support higher resolutions.
Selecting an AI Model
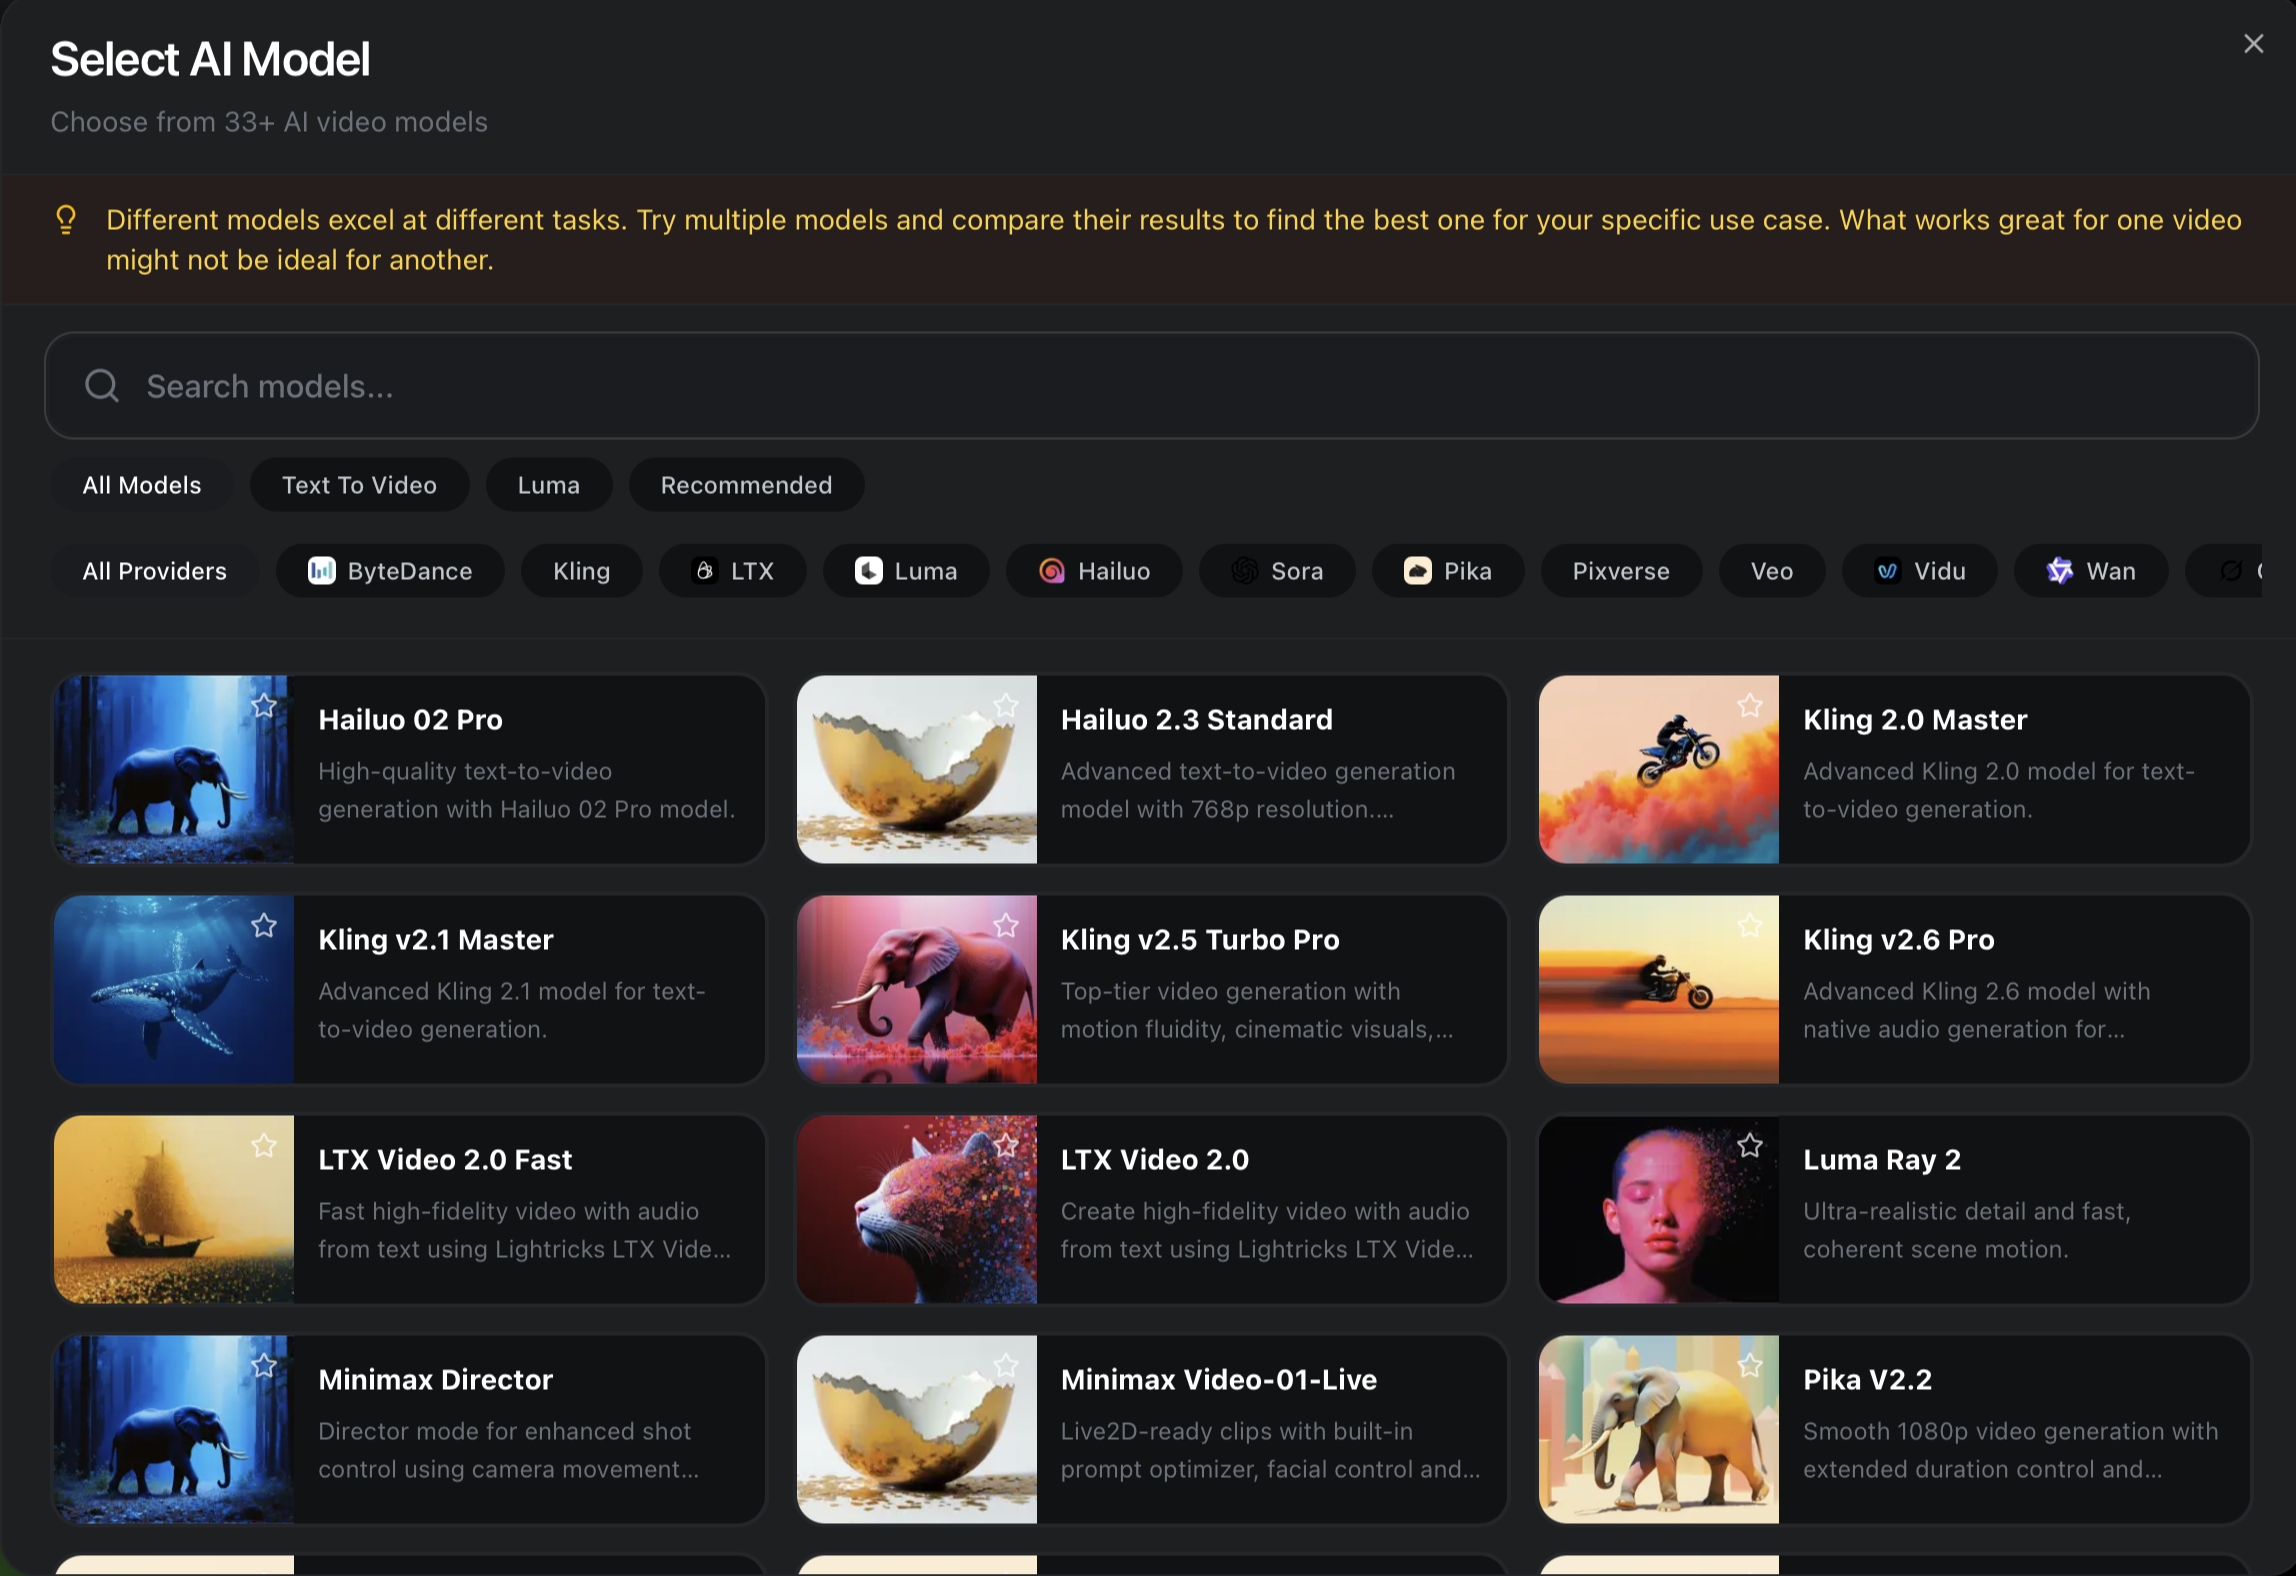
Click Change next to the current model name to open the model selector. Oakgen offers 33+ AI video models.
Filtering Models
Use the tabs and filter chips to narrow your search:
- All Models -- Browse everything
- Text To Video / Luma / Recommended -- Quick category filters
- Provider filters -- ByteDance, Kling, LTX, Luma, Hailu, Sora, Pika, Pixverse, Veo, Vidu, Wan
- Search bar -- Type a model name to find it instantly
Featured Models
| Model | Strength |
|---|---|
| Hailu 02 Pro | High-quality text-to-video |
| Hailu 2.3 Standard | 768p resolution, reliable |
| Kling 2.0 Master | Premium quality |
| Kling v2.1 Master | Best overall fidelity |
| Kling v2.6 Pro | Fast with motion fluidity |
| Kling v2.6 Pro | Native audio generation |
| Runway Gen-4 | High-fidelity with audio |
| Runway Gen-4 | High-fidelity with audio |
| Veo 3.1 | Ultra-realistic, coherent motion |
| MiniMax Hailuo 2.3 Pro | Enhanced shot control |
| Minimax Video-01-Live | Live2D-ready clips |
| Runway Gen-4 | 1080p, extended duration control |
Each model card shows a preview thumbnail, name, and a short description so you can quickly compare.
Different models interpret the same prompt differently. Spend a few credits testing 2-3 models with your prompt to find the best fit for your specific use case.
Generating and Viewing Results
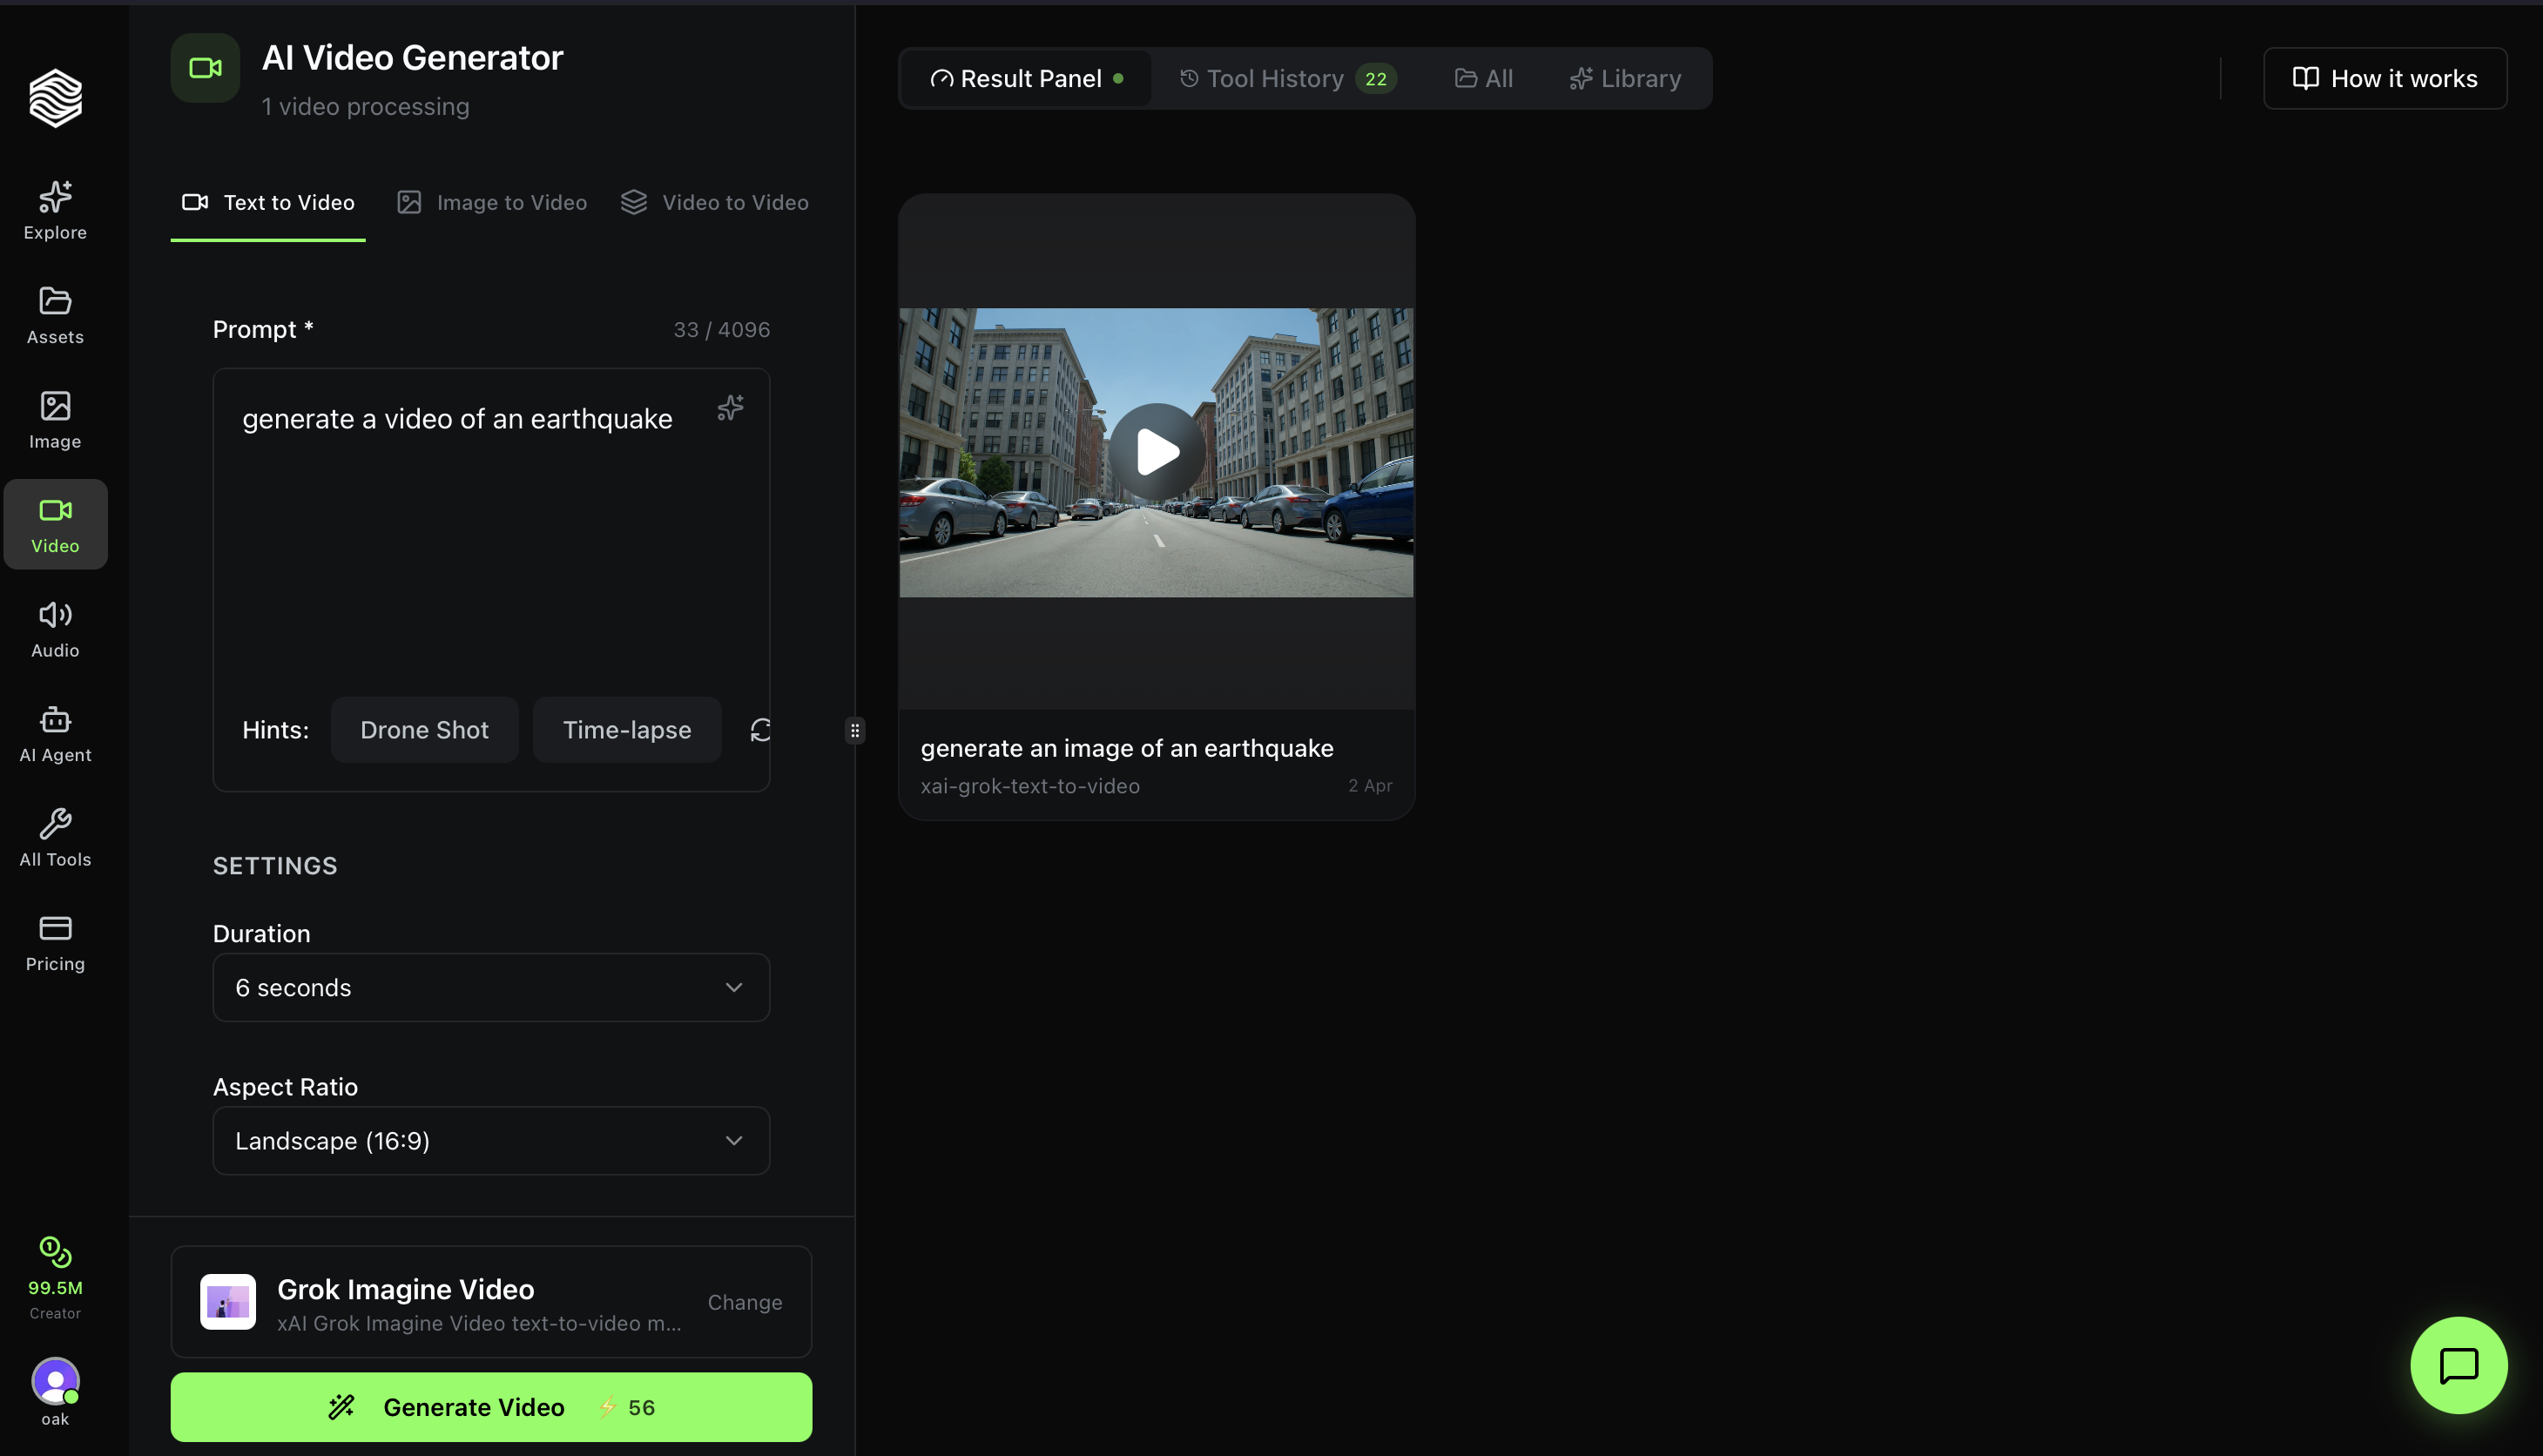
Click Generate Video to start. The button shows the credit cost (e.g., 56 credits). The status bar updates to show "1 video processing."
Once your video is ready, it appears in the Result Panel on the right. You can:
- Play the video directly in the browser
- Download in full resolution
- View the prompt and model used below the video
- Check Tool History to see all past generations
You will also receive a real-time notification when the video is complete, so you do not need to stay on the page.
Quick Reference
| Feature | Where to Find It |
|---|---|
| Switch modes (Text/Image/Video) | Tabs at the top |
| Write/enhance prompt | Main text area + sparkle icon |
| Set duration | Settings > Duration dropdown |
| Set aspect ratio | Settings > Aspect Ratio dropdown |
| Set resolution | Settings > Resolution dropdown |
| Change AI model | Click "Change" at bottom of left panel |
| View past generations | Tool History tab (right panel) |
| Save a video | Library tab (right panel) |
| See how it works | "How it works" button (top-right) |