The best AI image editor isn't the one that produces the prettiest new picture. It is the one that makes the requested change while leaving the rest of the source alone. That means a correct jacket-color edit should preserve the face, pose, hands, logo, lighting, crop, and background unless the prompt says otherwise.
Most comparisons miss that test. This guide gives you a reproducible 100-point benchmark for controlled image editing: five source images, four edit types, fixed prompts, hard-failure rules, and a scorecard you can use with Oakgen, GPT Image, Gemini, Firefly, or another editor. We don't publish a winner because we haven't run this exact protocol across every current model. The protocol is the useful part, and you can run it on the tools you are actually choosing between.
Run the Same Edit Across Several Models
Upload one source image to Oakgen, keep the prompt fixed, and compare how each editing model handles the requested change and the untouched regions.
Quick answer: choose the editor by the kind of control you need
| Editing job | Control that matters most | Good starting workflow | What to inspect before accepting |
|---|---|---|---|
| Change one color or material | Untouched-region preservation | Natural-language edit with a strict preservation clause | Face, logo, texture, shadows, crop |
| Remove or replace one object | Boundary control | Masked generative fill | Halos, repeated texture, broken reflections |
| Change a background | Subject isolation | Background selection or reference-guided edit | Hair, transparent edges, contact shadows |
| Add a branded object | Reference fidelity | Multi-image edit using the product as a reference | Logo spelling, proportions, label geometry |
| Revise the same image several times | Version stability | Conversational or history-based editing | Cumulative face, color, crop, and text drift |
| Compare model behavior | Consistent inputs | One workspace with the same source and prompt | Defaults, resolution, retries, failed edits |
Adobe documents a mask-led Generative Fill workflow where the user brushes the region to change. OpenAI's current image API supports whole-image edits, reference images, masks, and multi-turn revision; its documentation says GPT Image 2 processes image inputs at high fidelity. Google's Gemini image documentation also covers multi-turn editing, multiple references, and prompts that explicitly preserve faces or logos. Those are different control surfaces, so a fair comparison must test the editing mode as well as the model behind it.
Oakgen is our product. We include it because its image editor lets you try several editing models in one workflow. This article does not assign Oakgen or any third-party tool a score without a recorded test run.
Who should use this AI image editing benchmark?
Use it when a failed edit costs more than another generation. An ecommerce team may need a bottle moved into a summer setting without warping the label. A creative agency may need a shirt recolored while the talent's face stays exact. A designer may need a headline fixed without rebuilding the poster.
It is less useful when you want a loose restyle and welcome large changes. If the brief is “turn this into a dreamy watercolor,” preservation is no longer the primary job. Judge style and composition instead.
The protocol also helps teams stop arguing from memory. For example, “this model feels better” can become “this model preserved 18 of 20 protected details and passed three revision turns” after a recorded test.
Research note: what the benchmark measures
Text-guided editing has two separate obligations: satisfy the instruction and preserve the source. Google Research's EditBench evaluates edits across objects, attributes, scenes, and prompt specificity. Google Research's newer EditInspector adds accuracy, artifact detection, visual quality, scene integration, common sense, and change description.
Both projects point to a practical warning. A beautiful output can still be a bad edit. EditInspector also reports that current vision-language models can miss problems or hallucinate changes when they judge edited images. That is why this protocol uses human review as the final decision, with automated image differences used only as evidence.
Research and product documentation were reviewed on September 3, 2026. Model names, plan limits, and interfaces can change; keep the source pack and prompts fixed when retesting.
The Oakgen Controlled Edit Scorecard v1
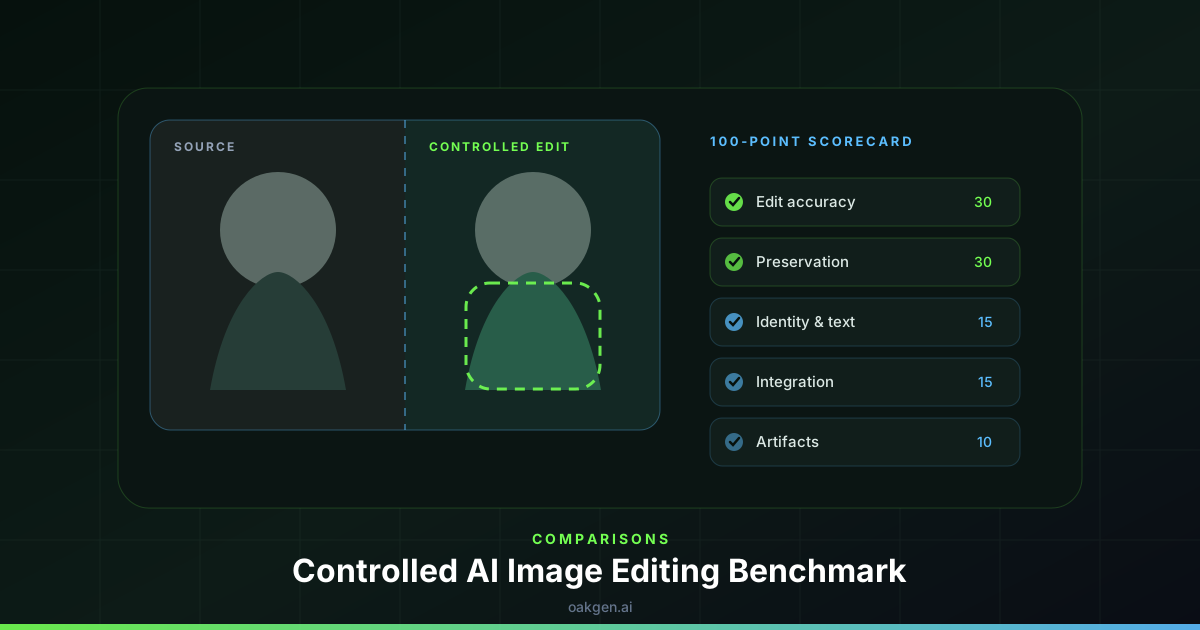
Score every output out of 100. Don't average away a broken logo or changed identity. Apply the hard-failure rules after scoring.
| Dimension | Weight | Question | Full-credit standard |
|---|---|---|---|
| Requested edit accuracy | 30 | Did the output perform the instruction? | The requested object, attribute, or setting changed correctly |
| Untouched-region preservation | 30 | Did unrelated pixels and relationships stay stable? | No meaningful change outside the edit region |
| Identity, text, and geometry | 15 | Did protected details remain recognizable and exact? | Face, logo, label, typography, and product shape hold |
| Edge and scene integration | 15 | Does the edit belong in the source image? | Lighting, perspective, grain, reflection, and occlusion match |
| Artifact and common-sense check | 10 | Did the edit create visual or physical errors? | No duplicate parts, warped hands, floating objects, or broken shadows |
Hard-failure rules
Mark an output failed, regardless of its numeric score, if any of these occurs:
- a protected person's identity changes;
- a protected brand name, legal line, barcode, or product label becomes wrong;
- the editor ignores the requested change;
- the output crops away required content or changes the aspect ratio without permission;
- the edit adds an unsafe, deceptive, or rights-violating element that wasn't requested.
Report both the median score and the hard-failure rate. An editor with an 88 median and a 20% identity-failure rate is not safer than one with an 84 median and no identity failures.
Test Preservation Before You Build a Campaign
Use one difficult product or portrait as the gate. If the model cannot preserve that source through a single edit, do not scale it to fifty assets.
Build the five-image source pack
Use images you own or have permission to edit. Keep uncompressed originals, then export identical working copies for every tool. The pack should contain different failure traps rather than five easy portraits.
Source A: portrait with small identity cues
Choose a waist-up portrait with visible hairline, earrings or glasses, patterned clothing, and both hands. Mark the face, accessories, hands, crop, and background as protected.
Source B: packaged product
Use a box, bottle, or pouch photographed at a slight angle. The label should include readable brand text, a small icon, fine print, and a material detail such as gloss or foil. These details reveal geometry and typography drift quickly.
Source C: furnished room
Pick a room with repeated lines, reflections, overlapping furniture, and directional light. Straight edges and repeated textures expose weak object removal.
Source D: flat graphic
Use a poster or social graphic with a headline, subhead, shape system, and negative space. This image tests whether an editor can change one text or color element without rebuilding the layout.
Source E: food or tabletop scene
Choose a scene with ceramic, glass, metal, cloth, and a cast shadow. Additions must match several material and lighting cues at once.
Save a protected-detail list beside each source. Reviewers should see it before scoring so they don't excuse drift after noticing a pretty result.
Run four controlled edit tasks per image
Twenty tasks are enough to reveal a pattern without turning the test into a research lab. Generate at least two outputs per task if the tool is stochastic, but never cherry-pick the best one silently. Record the first output and the best output separately.
Task 1: local attribute change
Change one property while preserving everything else.
Change only the navy jacket to matte forest green.
Keep the person's face, hair, expression, pose, hands, shirt, jewelry,
background, lighting, crop, and image dimensions unchanged.
Do not add or remove any object.
For the packaged product, change only the cap color. For the room, change one chair material. The request should stay visually plausible.
Task 2: object removal or replacement
Remove one item that overlaps a textured background, or replace it with a similarly sized object.
Remove the small red vase from the table and reconstruct the table surface
and wall behind it. Keep every other object, all reflections, the camera angle,
lighting, crop, and image dimensions unchanged.
Run this once with a plain-language editor and once with a mask if the tool supports both. Treat them as separate modes; a mask gives the editor information that a prompt-only model doesn't receive.
Task 3: reference-guided insertion
Supply a second image containing the product or prop to insert. Name which source owns which detail.
Place the bottle from reference image 2 on the empty coaster in image 1.
Preserve the bottle's exact shape, cap, label layout, and brand spelling.
Match image 1's camera angle, warm side light, table reflection, and grain.
Do not alter the person, furniture, framing, or background.
Google's current image prompt guide recommends describing the protected face or logo and stating that it must remain unchanged. Runway's reference-media guidance also recommends saving reusable character, product, and style references rather than treating every upload as interchangeable.
Task 4: three-turn revision chain
Start again from the original, then perform three narrow edits:
- Change the jacket color.
- Remove the vase from the resulting image.
- Add the reference product to the coaster.
Score every turn. The third output should preserve the original identity and the accepted changes from turns one and two. This catches cumulative drift that a one-shot comparison hides.
Keep Every Revision Comparable
Oakgen stores image-editor versions so you can return to an earlier result, branch the edit, and compare what changed across successive prompts.
How to score untouched-region preservation
Preservation is the hardest category because generative editors often rebuild more than the user notices at first glance.
Place the original and edited image at the same dimensions. Flick between them at 100% zoom, then inspect a side-by-side view. Check the protected list in order: face, text, product edges, object count, crop, lighting, background marks. A difference overlay can help locate movement, but it cannot tell you whether a difference matters.
For a local color edit, create a rough mask around the allowed region. Differences outside that mask need review. Compression noise should cost little or nothing; a shifted eye, redrawn logo, moved button, or altered shadow should cost points.
Use two reviewers for the identity and text categories when the asset will ship in paid media. Let each score independently before discussion. If they differ by more than five points on one dimension, inspect the image together and record the reason.
Record settings, failures, and retries
A publishable comparison needs a test ledger. Save this row for every output:
| Field | Example entry |
|---|---|
| Tool and model | Oakgen, selected editing model |
| Test ID | B3, packaged product reference insertion |
| Source version | source-b-v1.png |
| Prompt | Exact text, copied without edits |
| Mode | Prompt-only, masked, or reference-guided |
| Output size | Tool-reported dimensions |
| Attempt | First output or retry 2 |
| Generation time | Measured wall-clock time |
| Score | 82/100 |
| Hard failure | Yes or no, with reason |
| Reviewer note | “Label baseline shifted; cap and bottle shape held” |
The 82 above is an example of how to fill the sheet, not a measured result. Label examples that plainly.
Track retries because a cheap generation that needs six attempts may cost more than a pricier first-pass edit. Track failures too. Don't delete them from the dataset after finding a nicer sample.
Prompting rules for controlled image editing
The prompt should define four things: the target change, protected details, integration rules, and forbidden changes.
Weak prompt:
Make the jacket green and improve the photo.
“Improve” gives the model permission to retouch the face, restyle the background, change the crop, or alter the lighting.
Controlled prompt:
Target: change only the navy jacket fabric to matte forest green wool.
Preserve: face, hair, skin texture, expression, hands, shirt, jewelry,
pose, background, lighting, lens perspective, crop, and dimensions.
Integrate: keep the original folds, stitching, shadows, and fabric thickness.
Do not: retouch the person, add objects, remove objects, or restyle the image.
For more revision patterns, read how to revise an AI creative without starting over. When you need a fresh base rather than an edit, use the AI image generator, then move the accepted frame into editing.
Which editing mode should you choose?
Use a mask when the boundary matters more than conversational speed. Adobe's Generative Fill documentation exposes brush size, hardness, reference input, and the selected region. That is useful for removing a cable, replacing a sign, or controlling exactly which pixels may change.
Use a conversational editor when the request depends on relationships across the whole image: “move the lamp behind the chair while preserving its reflection,” for example. OpenAI's image generation guide documents single-image edits, mask-based edits, references, and multi-turn editing. Google's Gemini image guide documents multi-turn image modification and high-fidelity detail prompts.
Use a multi-model workspace when model selection is still an open question. Oakgen's strength is the workflow around the test: the same source, a consistent brief, model choice, version history, and onward access to image upscaling or video generation. A specialist may be better when you need Photoshop layers, pixel-level masking, RAW development, or deterministic typography.
Choose With Evidence, Not Demo Images
Run the 20-task protocol on your own portraits, packaging, rooms, graphics, and product scenes before committing a campaign to one model.
Common benchmark mistakes
Changing the prompt between tools. A rewritten prompt changes the test. Keep a shared version, including punctuation and preservation clauses.
Comparing a masked edit with a prompt-only edit as if the inputs match. They don't. Report the mode in the result.
Selecting the best of ten outputs against another tool's first output. Show first-pass and best-of-N scores separately.
Grading beauty instead of obedience. Better color grading can hide a wrong face or distorted label. Score the edit request first.
Using only AI judges. Automated review can help find changes, but EditInspector reports weaknesses in model-based edit assessment. A person should make the shipping decision.
Ignoring cumulative drift. One edit may look clean while the third revision loses identity or geometry. Keep the chained test.
FAQ
What is the best AI image editor?
There is no defensible universal winner without specifying the job. Mask-led tools suit narrow regional changes, conversational editors suit relationship-heavy revisions, and multi-model workspaces suit teams that need to test several model families. Run the same controlled edit on your own hardest source.
How do you benchmark an AI photo editor fairly?
Use identical source files, prompts, settings, output counts, and scoring criteria. Record the first result, retries, failures, timing, and editing mode. Judge instruction accuracy and source preservation separately.
What does controlled image editing mean?
It means changing the requested target while preserving unrelated content. The face, product geometry, text, lighting, crop, or background should not drift unless the instruction allows it.
Should I use a mask for AI image editing?
Use a mask when you can define the edit region and need tight boundary control. Prompt-only editing is faster for broad or relational changes, but it gives the model more room to redraw the source.
Can an AI image editor preserve a logo exactly?
Some models accept high-fidelity references and explicit preservation instructions, but no generative workflow guarantees exact logo reproduction. Inspect spelling, spacing, proportions, placement, and color before publishing.
How many outputs should I generate per test?
Two or three per task usually reveals variability without creating an unmanageable review set. Always retain the first output and label any best-of-N selection.
Can I use an AI model to judge the edits?
Use it as a second opinion, not the final grader. It can summarize visible differences or flag artifacts, but current research shows model-based edit assessment can miss errors and invent change descriptions.
How should I compare editing cost?
Measure cost per accepted output, including retries. Also record time spent masking, prompting, reviewing, and repairing the result in another editor.
Sources and further reading
- OpenAI image generation and editing guide
- Google Gemini image generation and editing guide
- Adobe Firefly Generative Fill guide
- Google Research: EditInspector
- Google Research: Imagen Editor and EditBench
- Runway reference-media guidance
Find Your Best AI Image Editor
Start with one source, one narrow instruction, and the 100-point scorecard. Oakgen lets you test the edit, keep each version, and continue into the rest of your creative workflow.