You generate a beautiful cyberpunk alley. Neon signs bleeding pink and blue onto wet asphalt, steam curling from a grate, a ramen stand glowing in the background. It is exactly the world you imagined. Then you generate the next shot in the same alley -- and the ramen stand is gone. The neon signs are different colors. The alley is wider. The steam is coming from the wrong side.
The biggest pain in AI content creation is consistency. Not single-image quality -- that problem is largely solved. The real problem is generating a second, third, and fortieth image that all look like they belong in the same world. If you are building a YouTube series, a product campaign, an animated short, or a game prototype, every frame needs to feel like it was shot on the same set. AI does not give you that by default.
This guide is about fixing that. You will learn how to build persistent AI environments -- locations, sets, and worlds that stay visually consistent across every shot, scene, and project. Not through luck or brute-force regeneration, but through a repeatable system.
Why AI Environments Break Between Shots
AI models generate each output independently. There is no memory between generations. When you type "cyberpunk alley at night" twice, the model interprets that prompt from scratch both times. It has no concept of "the same alley you generated three minutes ago."
The inconsistency shows up in three ways:
Spatial layout shifts. A hallway that was narrow becomes wide. A window moves from the left wall to the right. Buildings change height. The viewer's spatial memory of your world breaks.
Material and lighting drift. Warm amber lighting becomes cool blue. Brick textures change from rough to smooth. The atmosphere shifts even though the prompt is identical.
Object permanence failures. A parked motorcycle exists in one frame and vanishes in the next. Signage changes language. Architectural details appear and disappear.
One inconsistent background is a minor annoyance. Twenty inconsistent backgrounds across a video series make your content look amateurish.
The Environment Bible: Your Single Source of Truth
The foundation of persistent AI worlds is what I call an environment bible -- a detailed, locked-down description of every fixed element in your location. This is analogous to a production design document in filmmaking, where every detail of a set is specified before a single frame is shot.
Your environment bible is a text document that you paste into every prompt involving that location. It never changes between generations. It is the constant.
What to Include
Define these elements with precision:
Spatial geometry:
- Room or street dimensions (narrow, wide, claustrophobic, open)
- Key architectural features (arched doorways, exposed pipes, floor-to-ceiling windows)
- Fixed landmarks visible from multiple angles (a clock tower, a neon sign, a specific building)
Materials and surfaces:
- Wall materials (exposed red brick, brushed concrete, rusted corrugated metal)
- Floor or ground surface (cracked asphalt with puddles, polished marble, wooden planks)
- Ceiling or sky conditions (low industrial ceiling with fluorescent tubes, overcast sky with breaks of orange sunset)
Lighting conditions:
- Primary and secondary light sources with direction and color temperature
- Shadow quality and time of day
Fixed props and details:
- Objects that must appear in every shot (a graffiti tag, a parked taxi, a potted plant)
- Signage text and recurring background elements
Color palette:
- Dominant colors and overall color temperature
Example: Cyberpunk Ramen Alley
Here is a complete environment bible for a recurring location:
LOCATION: Ramen Alley

Narrow back alley in a dense Asian cyberpunk city, approximately
3 meters wide. Tall buildings on both sides, 6-8 stories,
covered in overlapping holographic signs in Japanese and Chinese
characters. Wet asphalt ground with shallow puddles reflecting
neon light.

LEFT SIDE: A ramen stand with a faded red canvas awning, warm
yellow incandescent bulbs strung across the front, wooden stools,
steam rising from large pots behind the counter.

RIGHT SIDE: A closed metal shutter door painted dark green with
rust spots, a stack of blue plastic crates beside it, a single
vending machine emitting pale blue light.

OVERHEAD: Tangled power cables and laundry lines connecting the
buildings. A single large holographic billboard at the far end
showing a woman's face in pink and cyan.

LIGHTING: Primary warm yellow light from the ramen stand on the
left. Secondary cold neon light (pink and cyan) from signage
above. Wet surfaces reflect both light sources. Overall mood is
warm in the foreground, cold in the background.

ATMOSPHERE: Light steam or haze in the air. Wet surfaces. No
rain currently falling but recently rained. Time: late evening.

COLOR PALETTE: Warm amber and yellow in foreground, electric
pink and cyan in midground, deep indigo shadows in background.
Every prompt for this location starts with this block of text, word for word. The scene-specific direction (camera angle, character, action) comes after it.
If your environment bible says "faded red canvas awning," always write "faded red canvas awning." Do not switch to "worn red tent" or "old red canopy." AI models treat each synonym as a different concept. Identical wording produces more consistent environments than "equivalent" wording.
Reference Image Anchoring: The Visual Lock
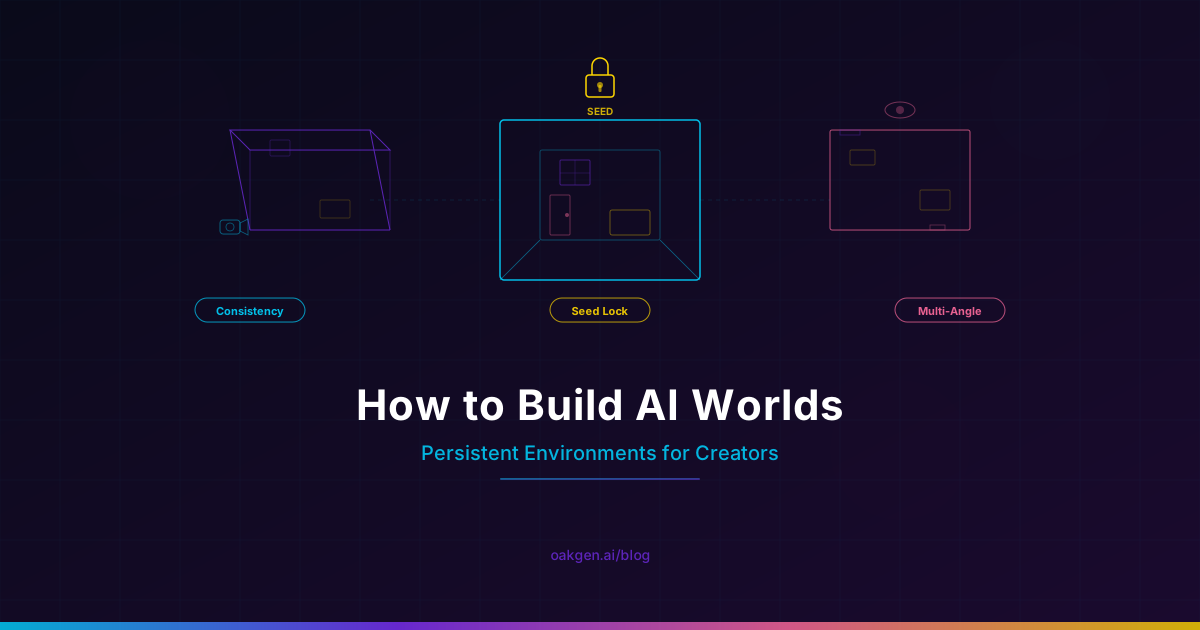
Text alone cannot fully lock down an environment. Language is inherently ambiguous -- "narrow alley" means something slightly different to the model every time. The strategy: generate one hero image of your environment, then use it as a reference for every subsequent generation in that location.
Step 1: Generate Your Canonical Environment Image
Open the AI Image Generator and paste your environment bible as the prompt. Generate multiple variations until you get one that matches your vision exactly. This is your canonical image -- the visual ground truth for this location. Spend time here. This single image will anchor hundreds of future generations.
Step 2: Create a Multi-Angle Reference Sheet
One angle is not enough. Generate your environment from at least three perspectives -- wide establishing shot, medium shot at human scale, and a detail close-up showing textures and props. Use your environment bible plus canonical image as reference for each. Composite all three into a single reference sheet.
Step 3: Use the Reference for Every Generation
For every new shot in this environment, include your reference sheet as the input image. Your prompt structure becomes: [Environment bible text] + [Reference image] + [Scene-specific direction]. The bible provides textual consistency. The reference image provides visual consistency. The scene direction tells the model what changes in this particular shot.
The AI Image Generator supports image-to-image generation with reference images. Upload your canonical environment image, adjust the influence strength, and add your scene-specific prompt. The model will maintain the visual identity of your environment while following your new direction.
The Seed Lock Technique
When you find a generation you like, note the seed value. The seed is the random starting point for the generation process. Same seed + same prompt + same model = very similar output.
This is not a guarantee of pixel-perfect reproduction -- model updates, slight prompt changes, and aspect ratio differences all introduce variation. But seed locking dramatically reduces drift between generations of the same environment.
Do not rely on seed locking alone. It is a supplement to the environment bible and reference image workflow, not a replacement. Seeds are fragile -- any change to the prompt or model version breaks the lock.
Building Environments Across Media Types
A persistent AI world is not just images. Creators working on video series, product campaigns, and interactive content need their environments to hold up across images, video, and 3D.
Image-to-Video Environment Transfer
The cleanest path from a static environment to a video set:
- Generate your canonical environment image using the workflow above
- Open the AI Video Generator and select an image-to-video model (Kling 3.0, Seedance 2.0, or Hailuo 2.3 Pro)
- Upload your canonical environment image as the starting frame
- Write a prompt describing the motion you want: camera movement, ambient animation (flickering lights, drifting steam), or character action
The environment in the video will match the starting image because the model is building on top of it. For a series of videos in the same location, always start from the same canonical image. This keeps spatial layout, lighting, and color palette locked across every clip.
Text-to-3D Environment Assets
For creators who need to place objects within their environments -- product shots in a branded studio, game assets in a themed world, architectural elements in a visualization -- text-to-3D generation lets you build individual environment pieces that you can reuse infinitely.
Generate key props as 3D models: the ramen stand, the vending machine, the neon sign. Once you have these as 3D assets, you can render them from any angle with any lighting. The 3D models do not change between renders -- they are permanent objects in your world. This is the closest AI gets to traditional set building.
| Method | Consistency Level | Setup Time | Best For |
|---|---|---|---|
| Environment Bible Only | Moderate | 15 minutes | Quick concepts, social media posts |
| Bible + Reference Image | High | 30-60 minutes | Image series, marketing campaigns |
| Bible + Reference + Seed Lock | Very High | 1-2 hours | Video series, YouTube content |
| Bible + Reference + 3D Assets | Highest | 2-4 hours | Product studios, game worlds, film |
| Full Pipeline (All Methods) | Production-Grade | Half day | Professional series, persistent brands |
Step-by-Step: Building a Persistent YouTube Studio
Let us walk through a concrete example. You are a YouTuber who wants a signature background for every video -- a virtual set that looks the same in every thumbnail, intro sequence, and B-roll shot. No green screen, no physical studio, no rental fees. Just a persistent AI-generated environment.
Step 1: Define Your Studio Bible
Start with the agent chat to brainstorm your studio concept. Iterate until you have a detailed environment bible. Here is what a tech reviewer's studio might look like:
LOCATION: Tech Review Studio

Modern minimalist studio space, approximately 4x6 meters.
Matte black back wall with subtle vertical ribbed texture.
Left side: floating wooden shelf unit (light oak) displaying
tech products -- a pair of white headphones, a small plant in
a concrete pot, two hardcover books standing upright.

Right side: 27-inch monitor on a matte black monitor arm,
mechanical keyboard with white keycaps, desk lamp with brass
arm and matte black shade, all on a walnut standing desk.

Floor: polished concrete, medium gray, with a small off-white
wool rug under the desk area. Background: single LED strip
along the top edge of the back wall emitting a soft warm white
glow. No colored RGB lighting.

LIGHTING: Key light from upper right (large softbox, daylight
balanced 5600K). Fill from upper left (softer, warmer, 4000K).
Subtle rim light separating subject from background. Overall
clean, professional, slightly warm.

COLOR PALETTE: Black, walnut brown, warm white, brass accents.
No bright or saturated colors. Muted and professional.
Step 2: Generate Your Canonical Studio Image
Paste this bible into the AI Image Generator and generate 10-20 variations. Pick the one that best matches your vision. This becomes your canonical reference.
Step 3: Create Angle Variants
Using your canonical image as reference, generate wide, medium, close-up, and over-the-shoulder variants. Composite them into your reference sheet.
Step 4: Generate Video B-Roll
Take your medium shot into the AI Video Generator and generate ambient clips -- a slow dolly across the desk surface, a gentle push-in toward the shelf, the desk lamp flickering on. These clips become your reusable B-roll library, all visually anchored to the same room.
Step 5: Build Thumbnails
For every new video, generate a thumbnail using your environment bible, canonical studio image as reference, and a scene-specific addition like "Holding the new [product name], looking excited, product box visible on desk." The studio stays identical. Only the subject and featured product change. Your channel develops a recognizable visual signature.
Build Your First Persistent AI World
Advanced Techniques for Production Work
Once you have the fundamentals working, these techniques push environment consistency further.
Environment Style Guides With Lighting Variants
Real-world locations look different at different times of day. Create lighting variants of your canonical image -- daylight, golden hour, night, overcast -- by modifying only the lighting descriptions in your environment bible while referencing the canonical image. The spatial layout stays locked. Only the lighting changes. When you need a scene set at night, use the night variant as your reference.
Multi-Location World Building
For series with multiple recurring locations, build a separate environment bible and reference sheet for each location. But add a world-level style guide on top:
WORLD STYLE: Neo-noir cyberpunk. Consistent across all locations.
- Color temperature always skews warm in interiors, cool in exteriors
- All signage uses the same fictional language/font style
- Recurring graffiti tag appears in every exterior location
- Wet surfaces are present in all outdoor scenes
- Haze or atmospheric fog in every shot
This world-level consistency layer ensures that your locations, while distinct, all feel like they exist in the same universe. The ramen alley and the corporate lobby and the rooftop garden all share an atmospheric DNA.
Filmmaker Workflows
For filmmakers and content creators building narrative projects, environment consistency is not optional -- it is the difference between a professional short film and a disjointed collection of AI clips.
The workflow: build environment bibles for every location in your script, generate canonical images, then batch-generate all shots for a single location in one session using the same reference image and seed range. Compare shots from different sessions and regenerate if any detail has drifted.
YouTubers building episodic content follow the same pattern. Your recurring set is a single location that needs to look identical in episode 1 and episode 50.
Common Mistakes That Break Consistency
Rewriting your environment bible between generations. Even small wording changes introduce variation. Write it once, copy-paste it exactly.
Switching models mid-project. Different models interpret the same prompt differently. Pick one model for your environment work and stick with it throughout the project.
Overloading the prompt with scene direction. When your scene-specific additions become longer than your environment bible, the model prioritizes scene direction over environment description. Keep the bible front-loaded and scene direction concise.
Ignoring the background. Viewers will not notice if a character's sleeve changes slightly between shots. They will absolutely notice if the building behind the character changes shape.
AI model providers update their models periodically. A model update can change how the same prompt is interpreted, breaking consistency with images you generated on the previous version. When starting a project that will span weeks or months, generate all environment reference images early and rely heavily on image-to-image references rather than text-only prompts. The reference image survives model updates. The text interpretation may not.
The Full Persistent Environment Pipeline
Here is the complete workflow from concept to production-ready persistent environment:
- Concept -- Describe your world in the agent chat. Iterate on the mood, genre, and key details.
- Environment Bible -- Write a locked-down text description covering geometry, materials, lighting, props, and color palette.
- Canonical Image -- Generate your hero environment image in the AI Image Generator. Iterate until it is right.
- Reference Sheet -- Generate 3-4 angle variants. Composite into a single reference sheet.
- Lighting Variants -- Generate time-of-day or mood variants using the canonical image as a base.
- 3D Assets -- Generate key props as 3D models for angle-independent reuse.
- Video Extension -- Use canonical images as starting frames for video generation. Build ambient B-roll and motion clips.
- Production -- Generate all project shots using the environment bible + reference images. Batch by location for maximum consistency.
This pipeline scales. A solo YouTuber might stop at step 4. A production team might use all eight steps. The investment is front-loaded -- once your references are built, every subsequent generation is fast and consistent.
Earn 25% recurring on every referral.
Share Oakgen, get paid every month they stay.
FAQ
Can I maintain environment consistency across different AI models? Not reliably through text prompts alone. Each model interprets prompts differently. However, image-to-image generation with a strong reference image gets reasonably consistent results across models. For critical consistency, stick to one model per project.
How many reference images do I need for a persistent environment? One canonical image is the minimum. Three to four angle variants composited into a reference sheet is the practical sweet spot. Beyond that, diminishing returns unless you are building a complex multi-room environment.
Does this workflow work for video generation too? Yes. Use image-to-video mode rather than text-to-video. Your canonical environment image becomes the starting frame, and the video model builds motion on top of it. The spatial layout, lighting, and color palette carry over because the model is extending the image in time rather than generating from text.
How long does it take to set up a persistent environment? For a simple single-location setup (bible + canonical image + reference sheet), about 30 to 60 minutes. For a full multi-location world with lighting variants and 3D assets, expect a half day. This is a one-time investment -- every generation after setup is fast.
What if my environment needs to change over time? Build multiple versions of your environment bible with controlled changes. "Ramen Alley -- Clean" and "Ramen Alley -- After the Storm" are two separate bibles sharing 80% of the same text but with specific modifications. This gives you narrative progression while maintaining spatial consistency.
Do I need several separate subscriptions for AI world building? No. Oakgen uses one paid credit balance across image, video, 3D, and AI chat. Check the pricing page for current plans.
What to Read Next
- Text-to-3D: Generate 3D Models from Text with AI -- how to build reusable 3D props and environment assets for your persistent worlds.
- How to Generate a Cinematic AI Video With Veo 3 -- the video generation side of the pipeline, with detailed prompting techniques for cinematic shots in your environments.
- Complete AI Creation Pipeline on One Platform -- how to chain image, video, audio, and 3D generation into a single production workflow.